

How to integrate any website with Bitrix24 using a widget and CRM form
Bitrix24 developers have made great efforts to ensure that Bitrix24 integration with other systems for information exchange is possible.
In this article, we look at how such information exchange is possible with a company website and show you how to set up leads using the Bitrix24 and Website integration.
Let’s start.
We are going to use Bitrix24 cloud and WordPress installation with default settings.
Your website can be built on any platform, it doesn't matter. We will just add the html code created by Bitrix24 to it at the end.
For demonstration purposes, we will use two test websites: a site built on the Bitrix and another built on WordPress.
Test website created on Bitrix:

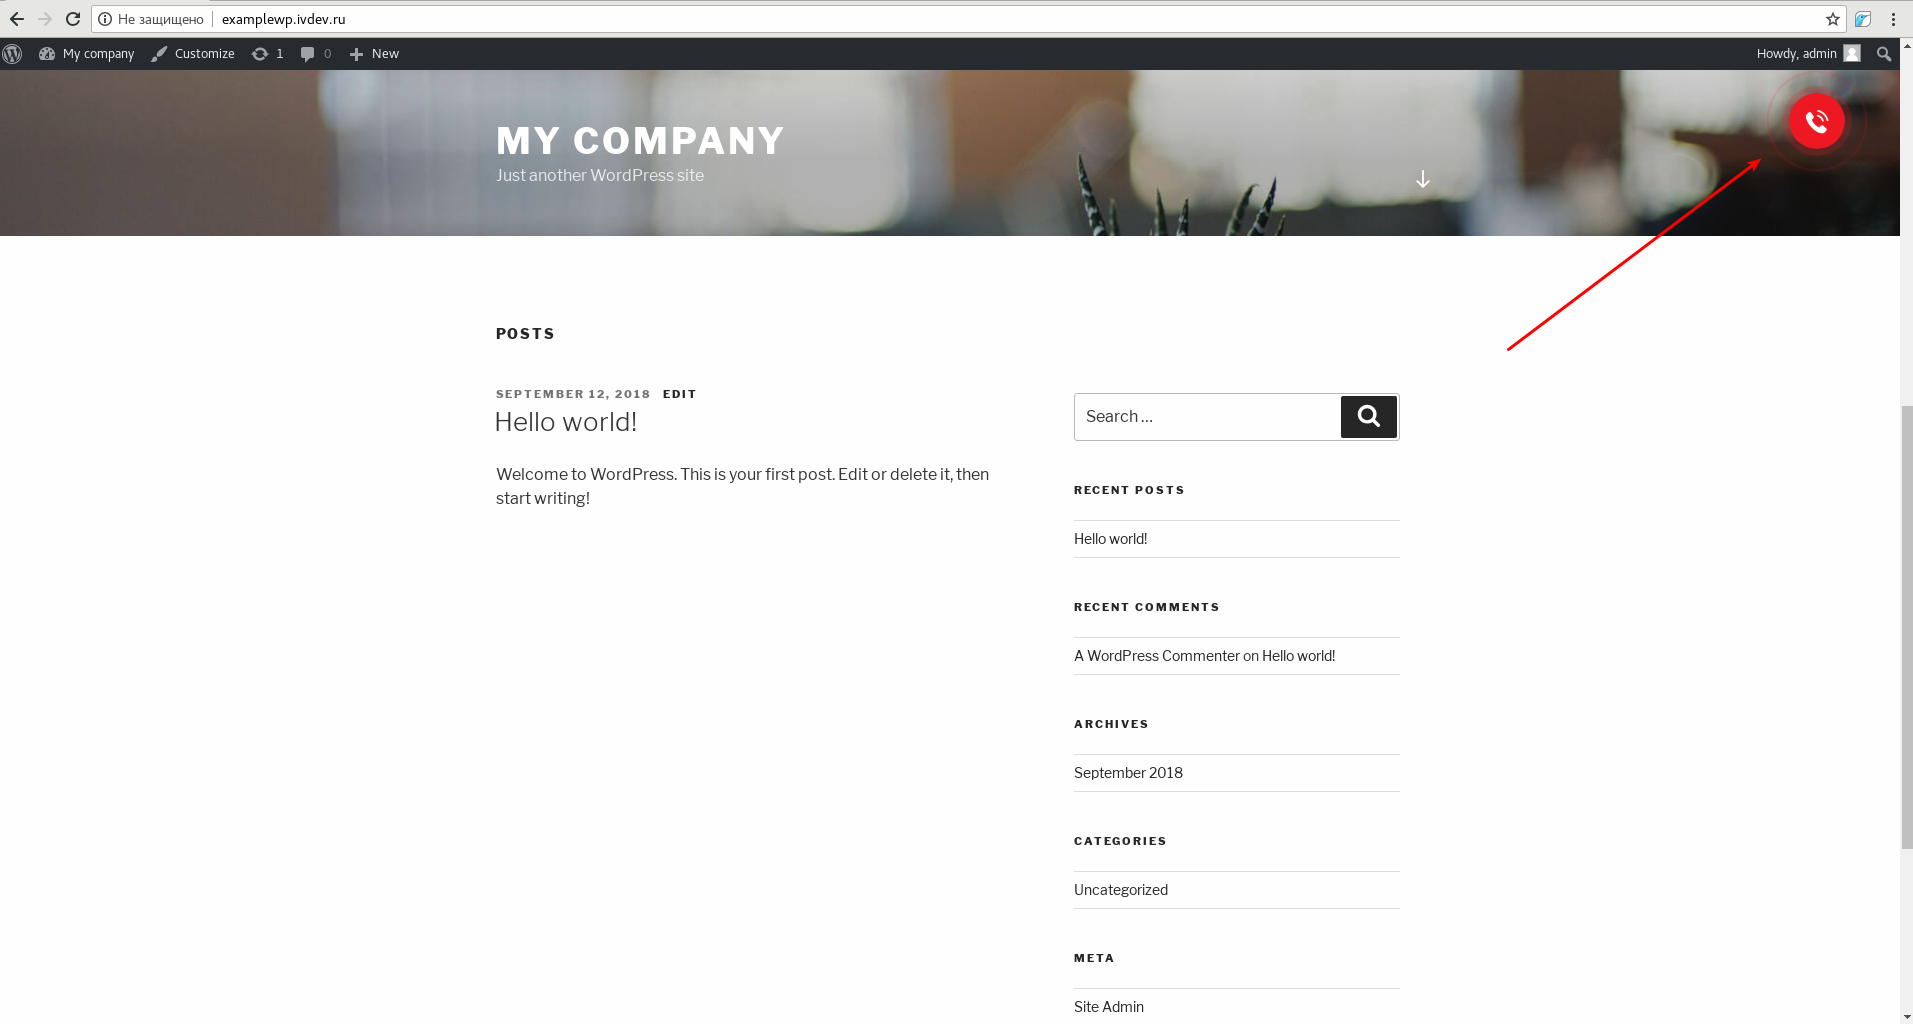
Test website created on WordPress :

Callback is a common element on websites. It looks like a receiver which vibrates or flashes to attract attention.
You can set up a similar element on your website using Bitrix24 without the help of a programmer.
The setup procedure includes three stages:
-
setting up a form that will be called by the widget.
-
setting up the widget itself;
-
placing the widget on the website.
Setting up a CRM form on a website
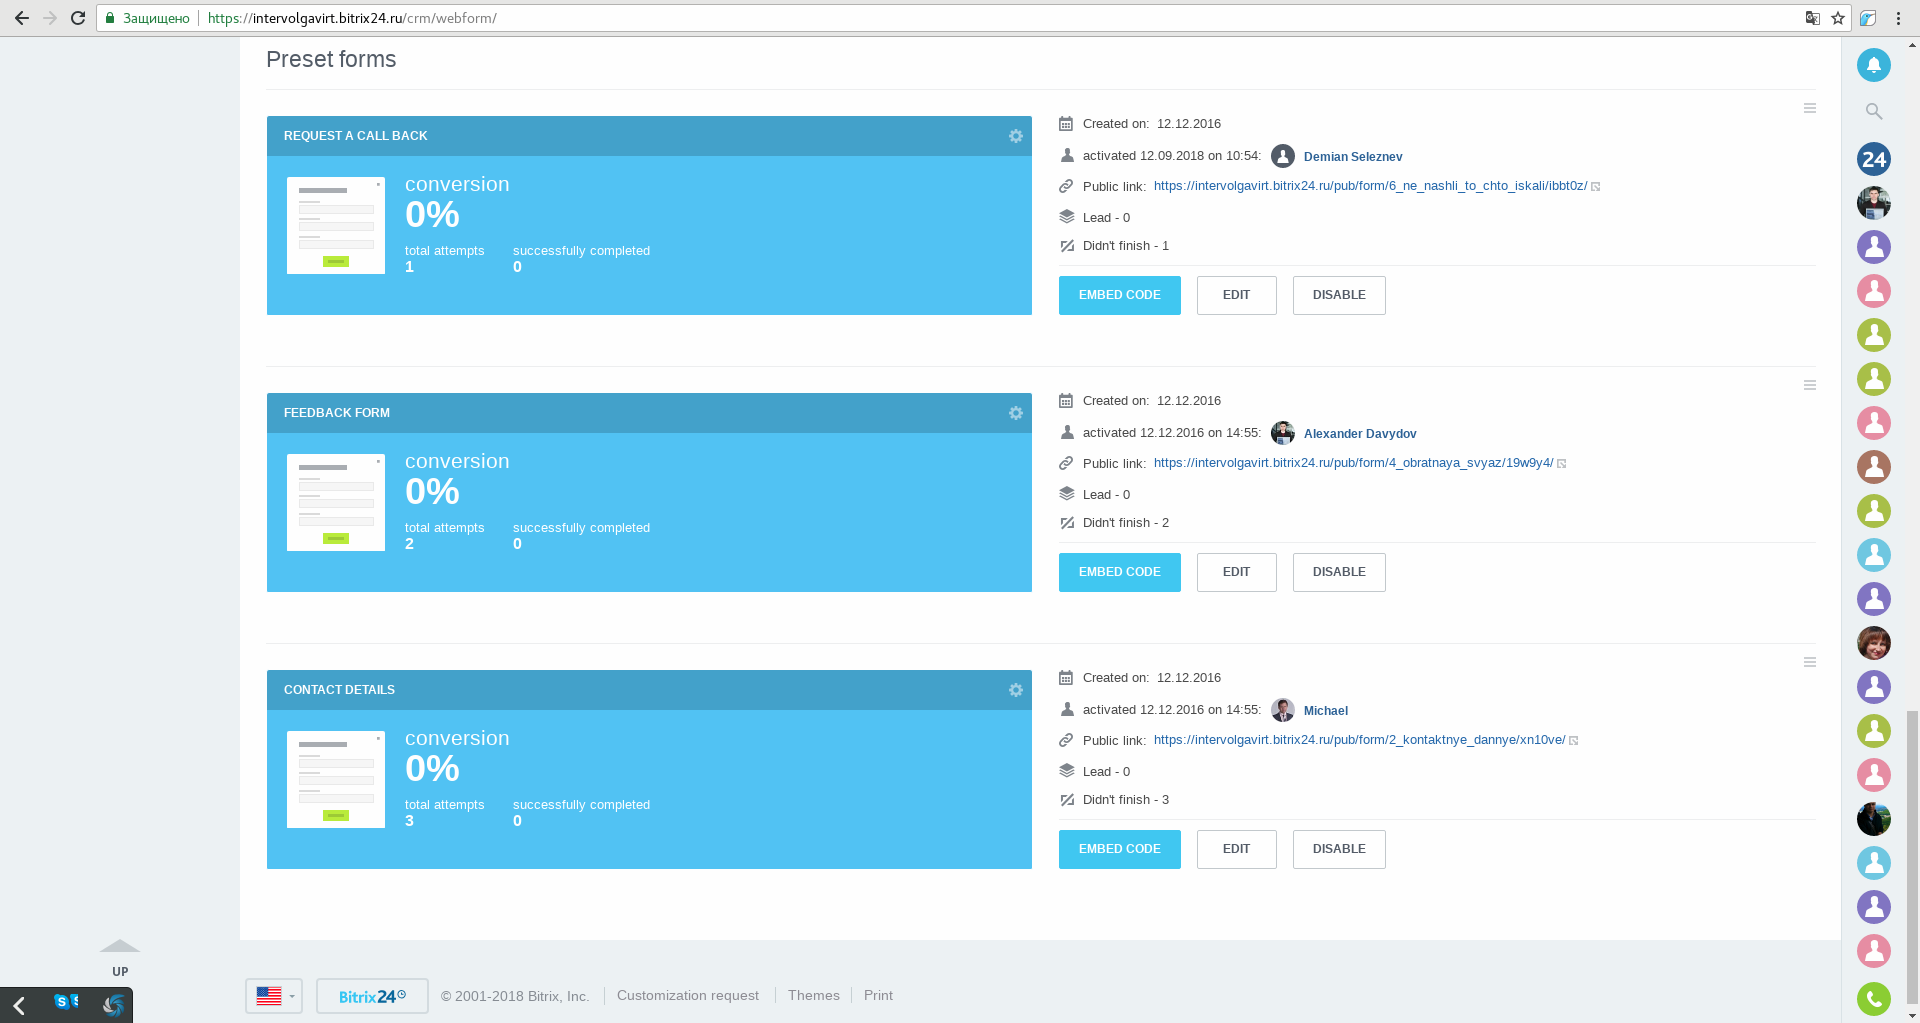
Open the CRM forms section in Bitrix24 CRM.

In updated Bitrix24 CRMs, You will find CRM forms and widgets in "add-ons"

In the window which opens you will see three preset forms: Callback, Feedback Form and Contact Details:
The next thing you need to do is to copy the form you need to embed.
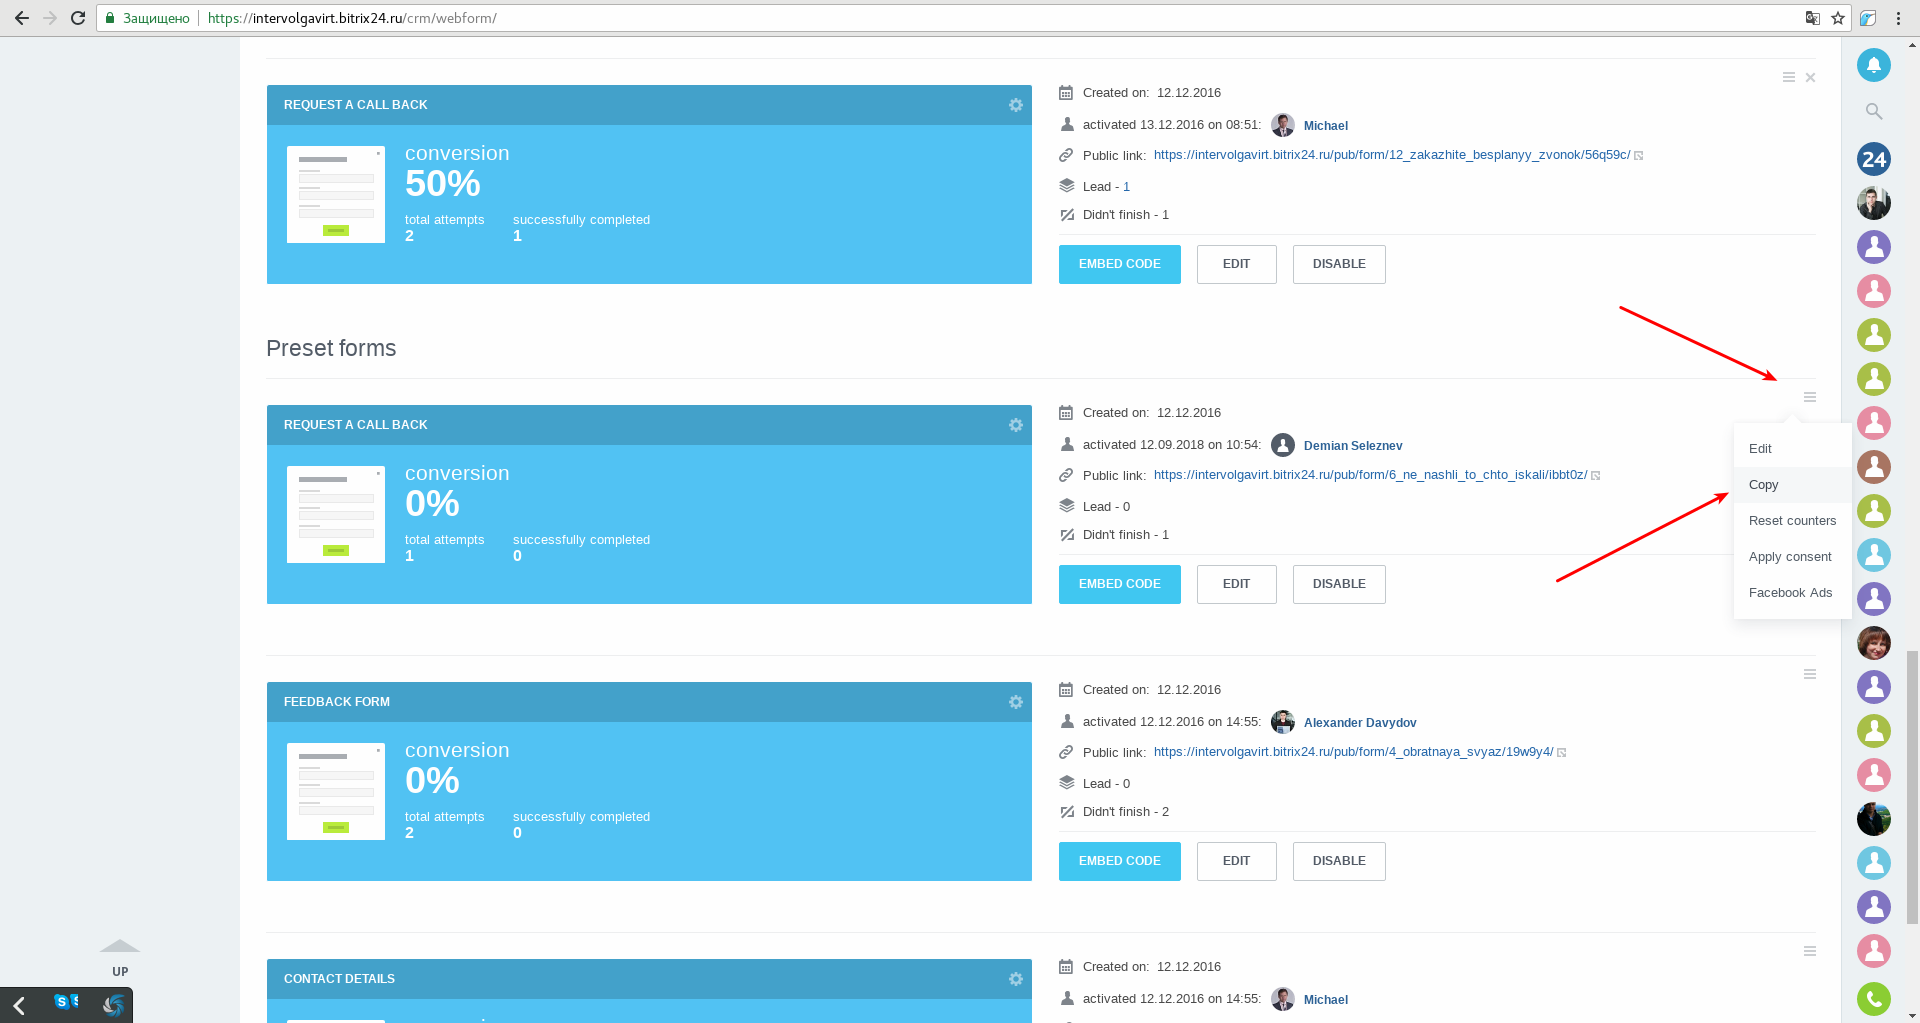
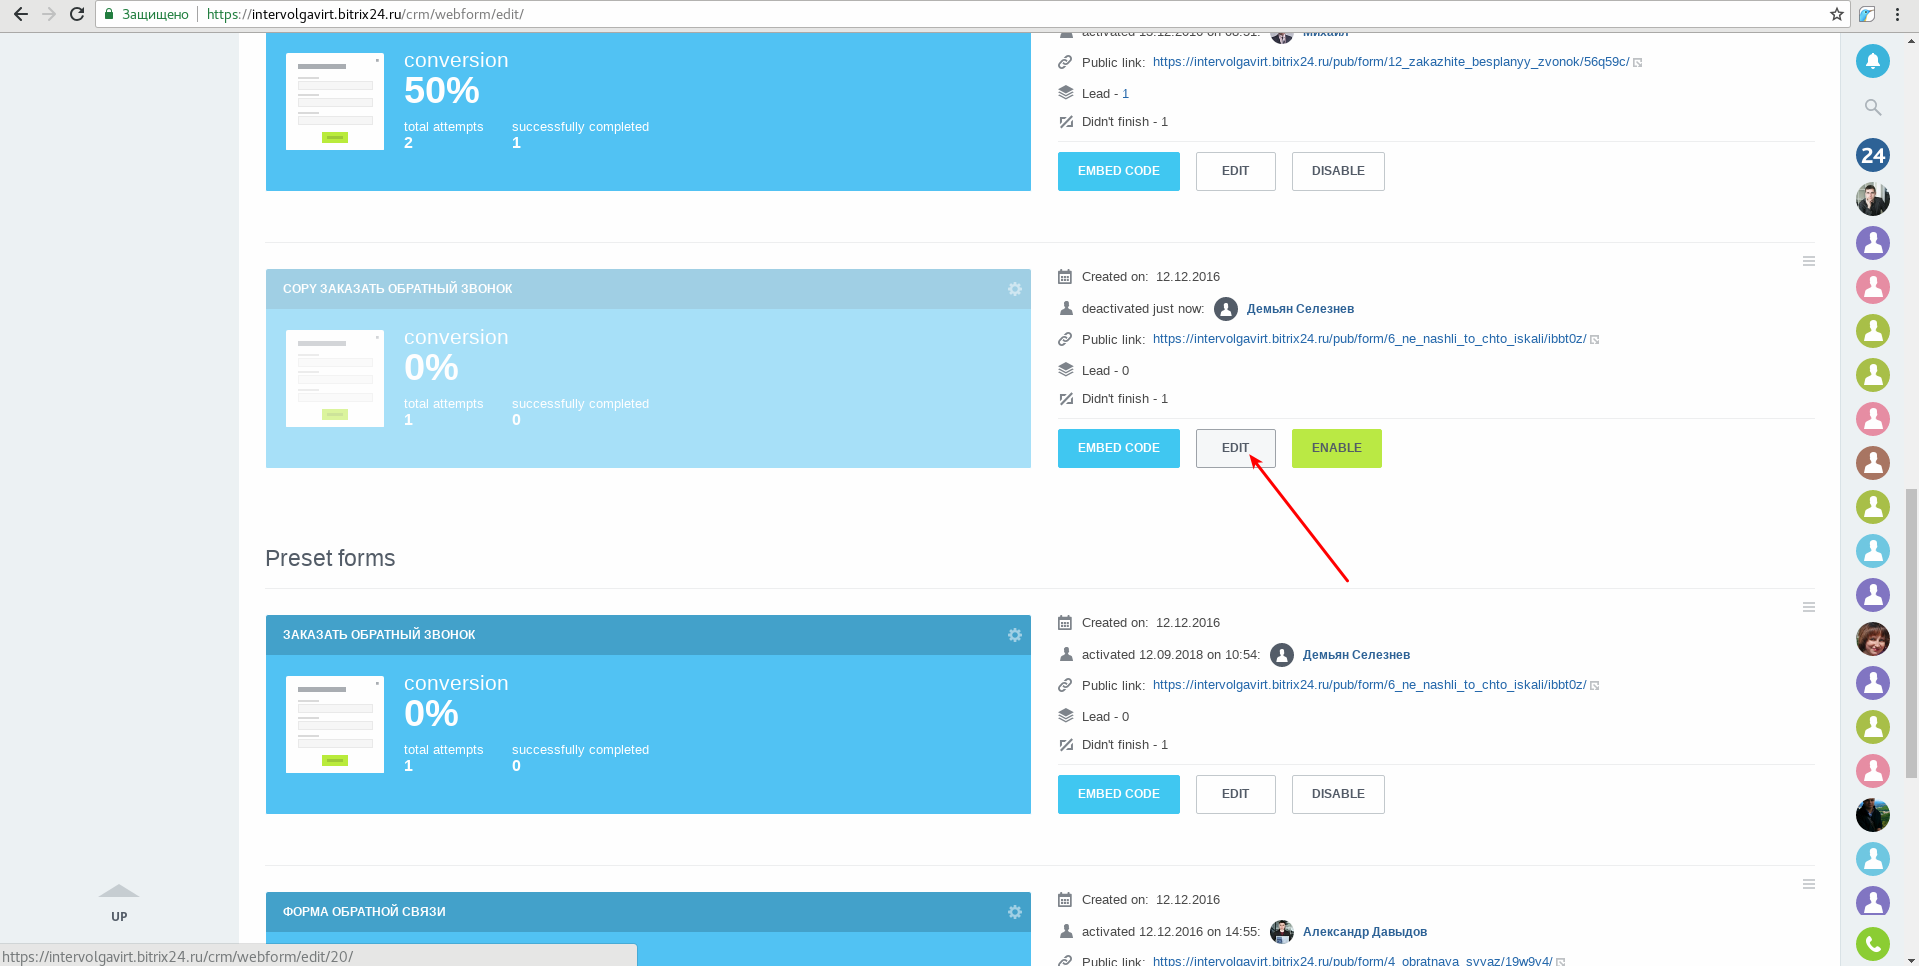
You can see the brand new form you just copied from preset ones. Click the "edit button".
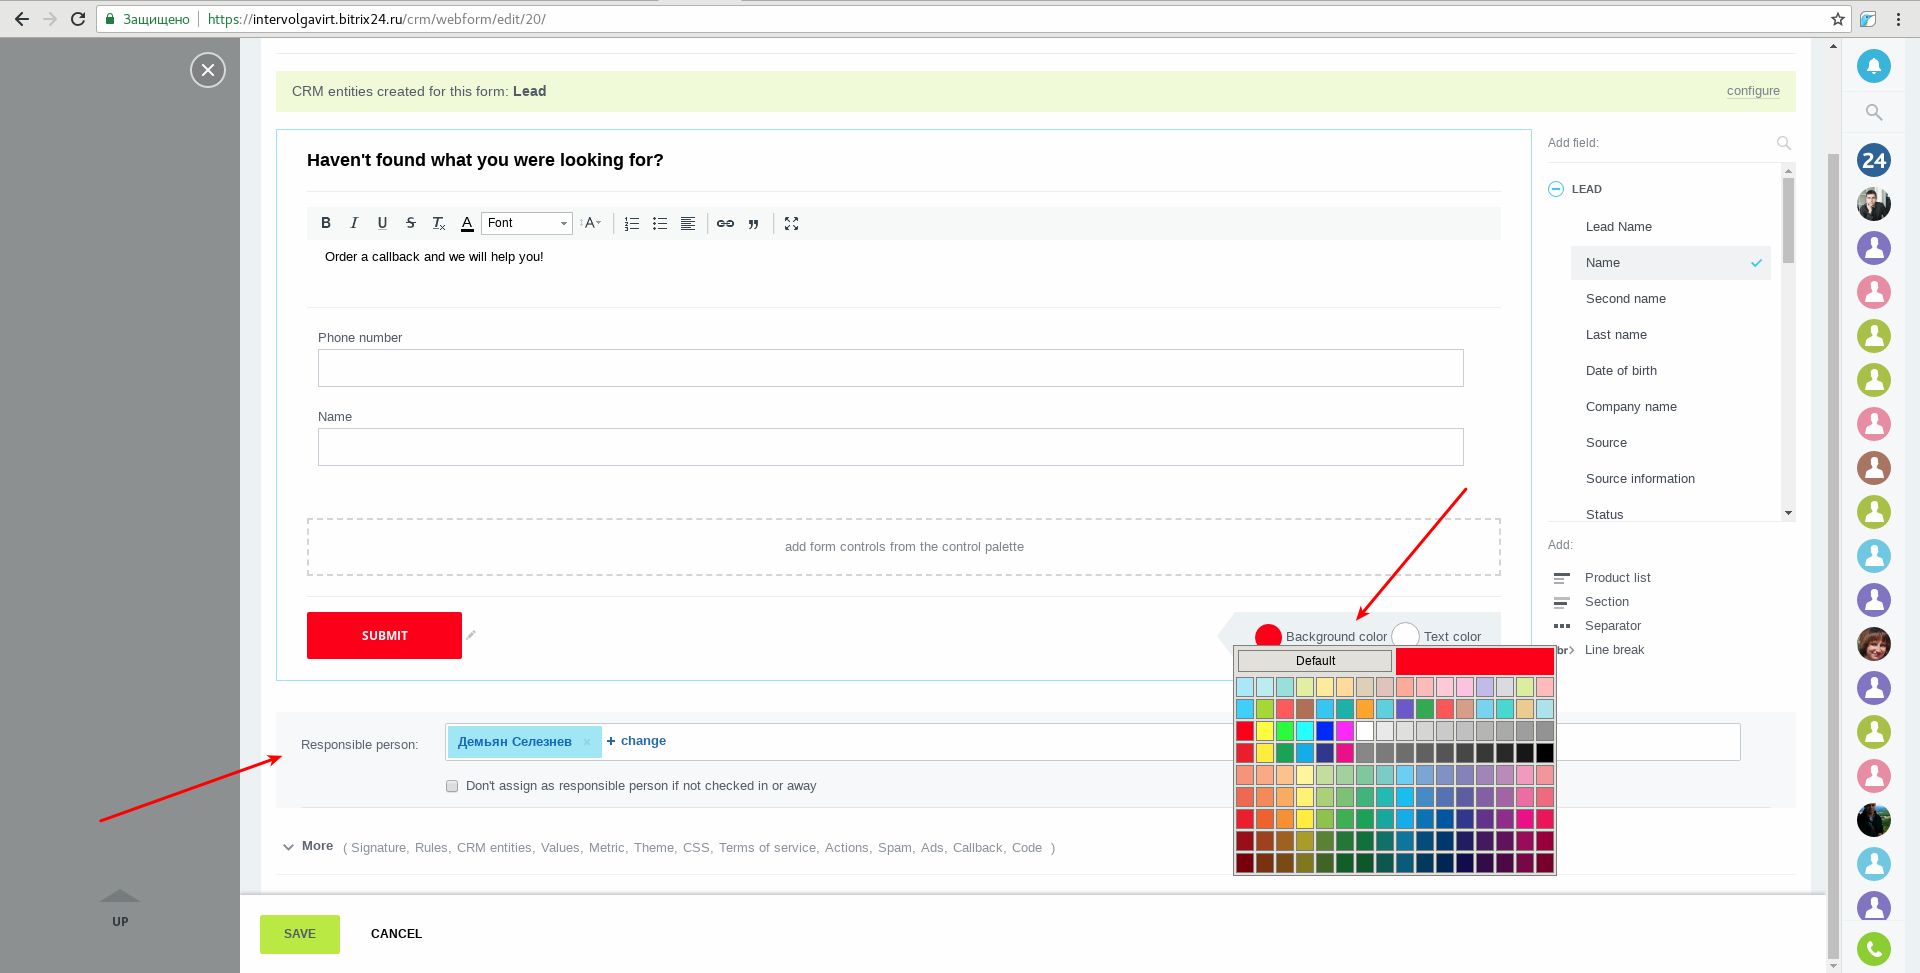
Next, edit the form. Change the name, heading and text in the form as shown below. We can also add a Name field from the Lead entity. To do this, open the Lead section and click the Name field:
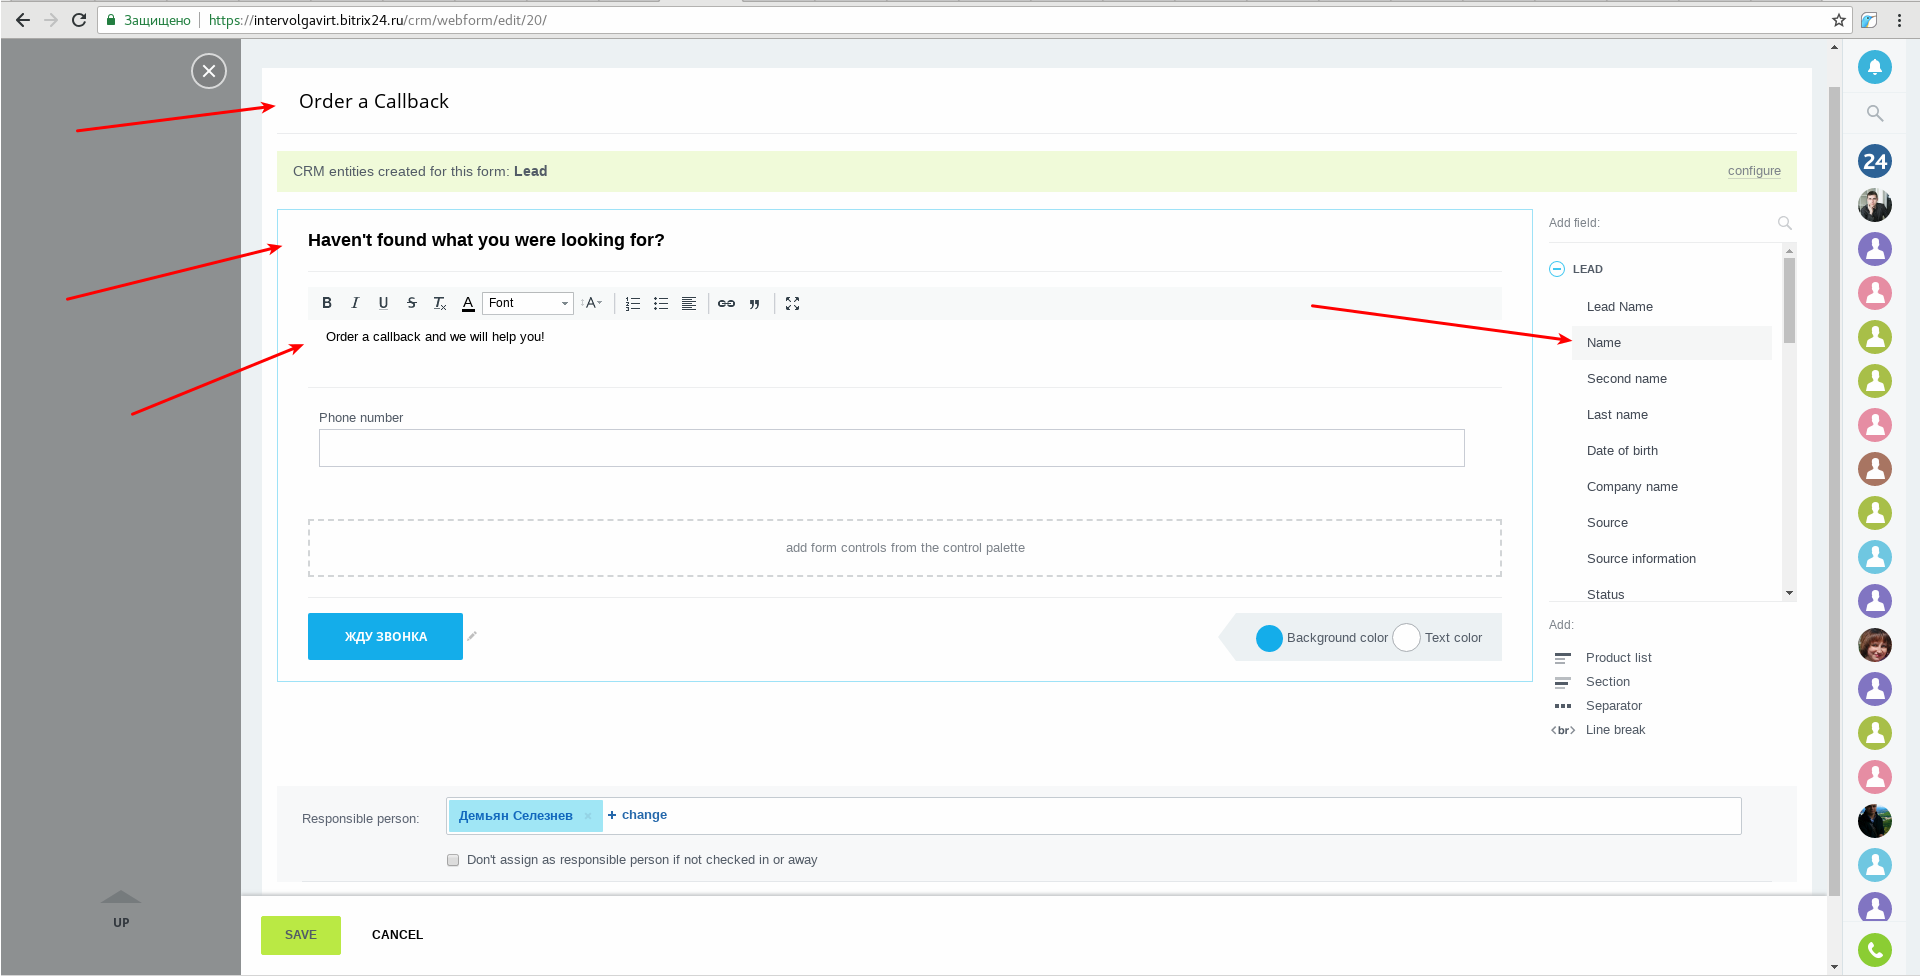
The default color is blue. If it does not match with the color palette of your website, you can choose a more suitable option in the Color field.
Do not forget to indicate the person responsible for the new lead or calling the client back in the Responsible Person field:
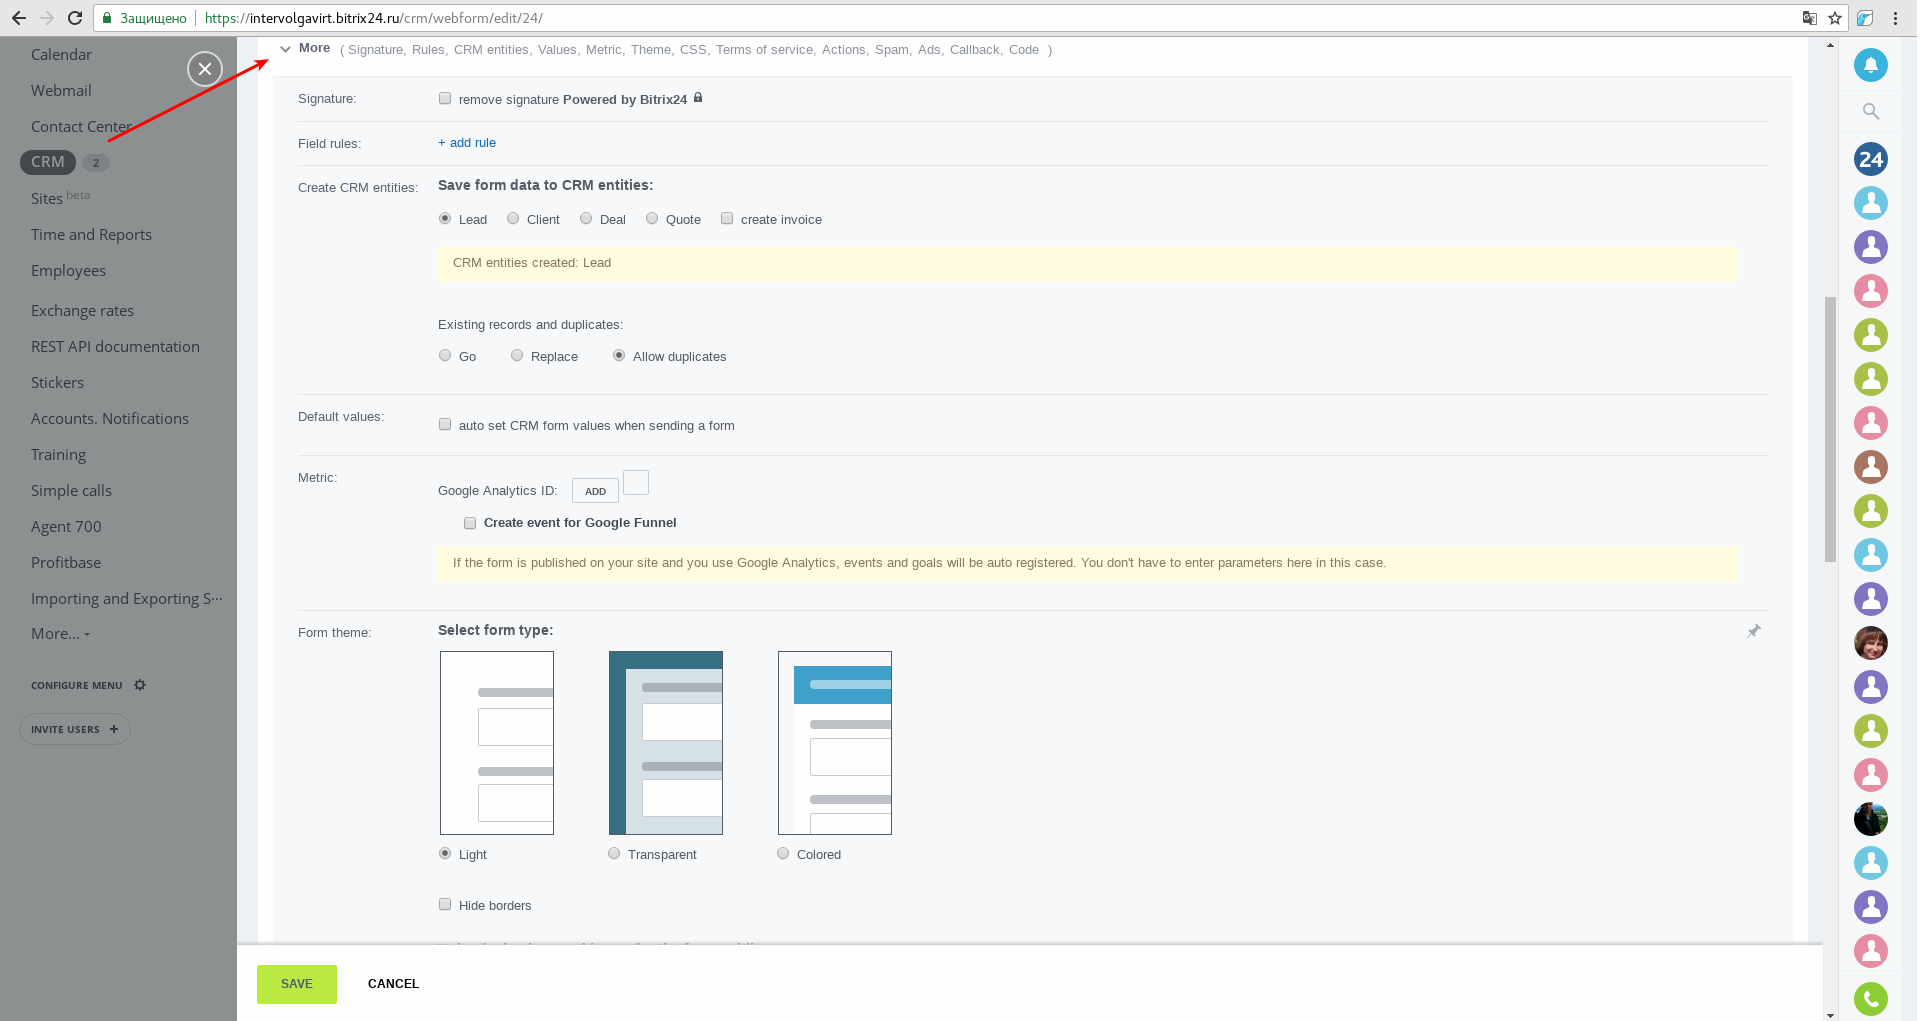
Open the "More" section. It contains a lot of useful settings for our form, which allow setting rules for lead field completion and setting metrics for advertising campaign evaluation by marketers:
Save the form.
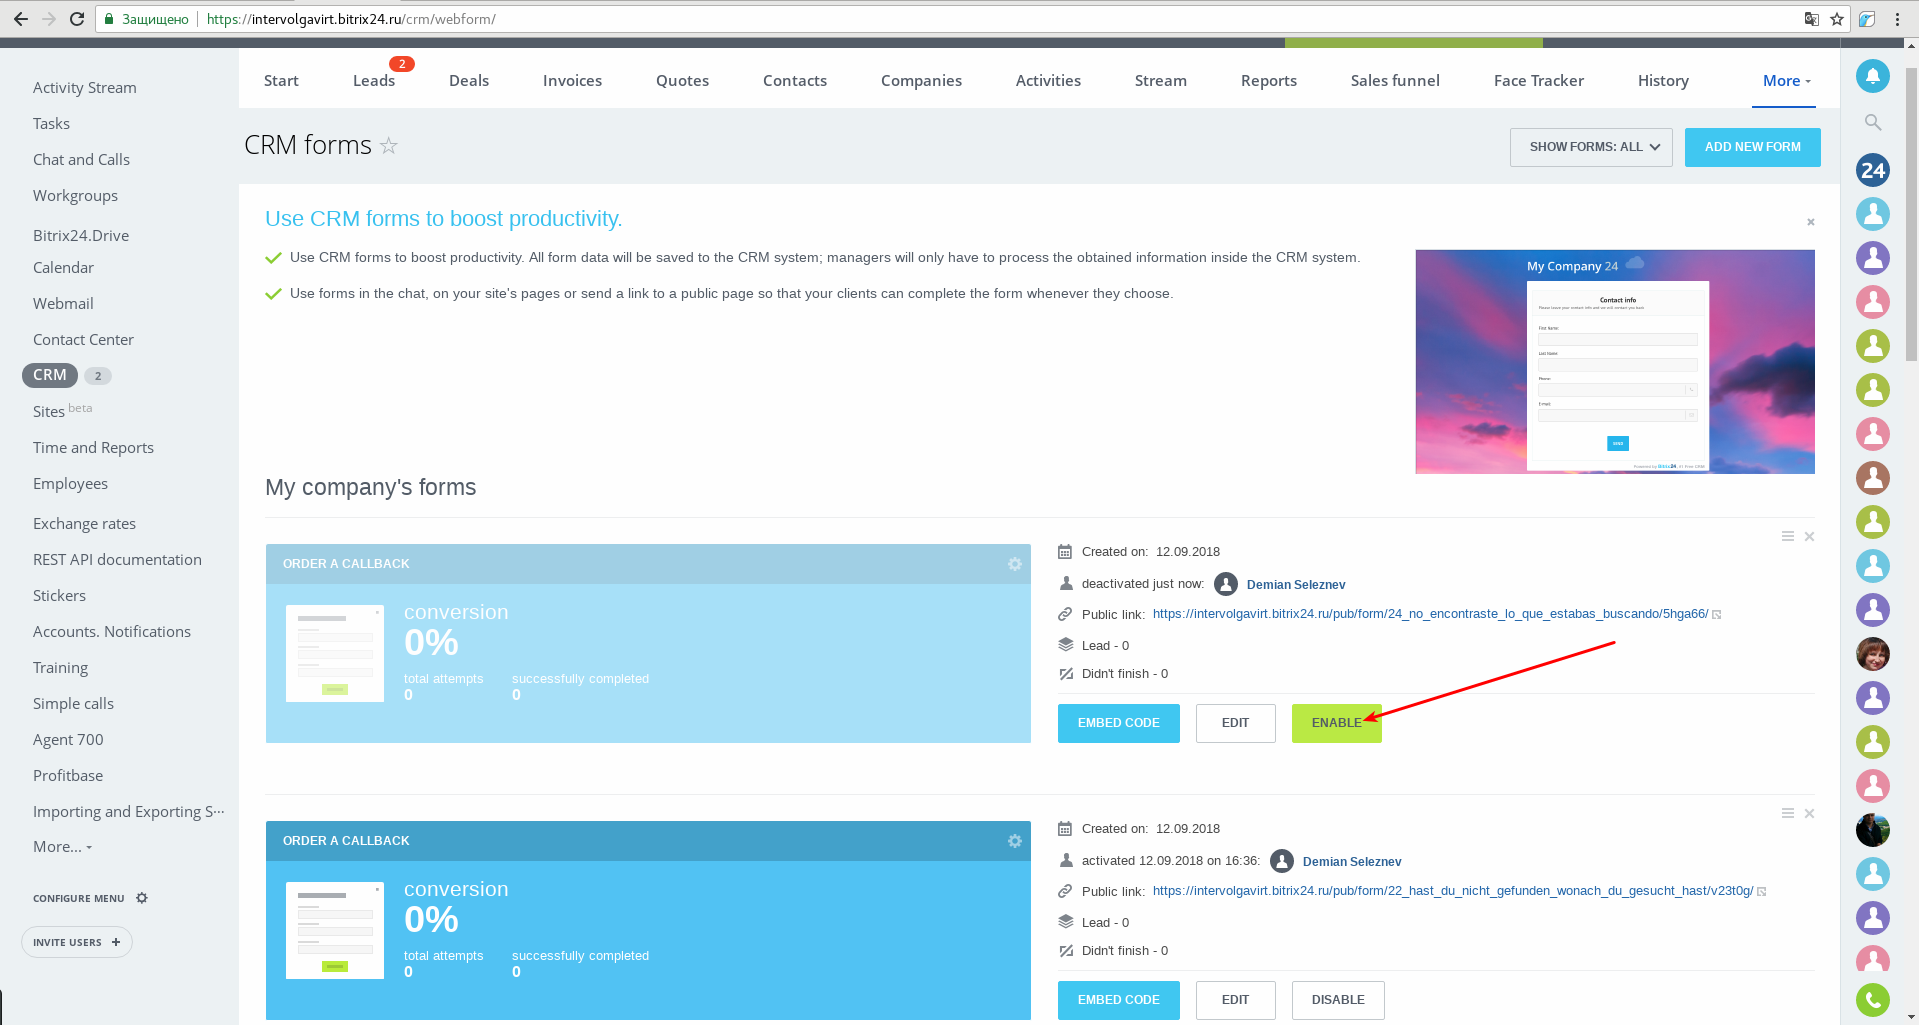
After you have saved your new form, you will see it in the list. Do not forget to enable it:
Now you can place the form on any of your web pages.
To do this, click the website code button and copy the presented code to the required page.
However, we do not need just a form on the website, but a receiver which will attract attention, i.e. a widget. Therefore, we need to go to the second stage.
Setting up a Bitrix24 widget on any website
Let us create a widget and attach our new callback form to it. To do this, go to CRM and select Website Widget in the menu.

This will open a window with a ready widget. It shows a few channels for incoming leads:
-
Open lines (for communication with clients on social networking sites);
-
Feedback form (to receive enquiries from clients);
-
Callback.
We need to create a widget only for ordering a callback.
Select Create Widget:

Input the Order Call widget name.
Disable the unnecessary channels – open line and CRM form, and select the Order Callback form.
On the right of the window there are settings for the widget position, color and website page show time.
Let us set up our widget on the website:

Let us save the widget. Now we have a set widget with the required form attached to it. Let us move on to the third stage – placing the widget on the website.
Placing a Bitrix24 widget on a Website
To place a Bitrix24 widget on a website, add the script created by Bitrix24 to the html code of the page.
We will show you how to place the widget on the website so that it appears on all pages.
We will use our test site created on Bitrix24 for this example.
-
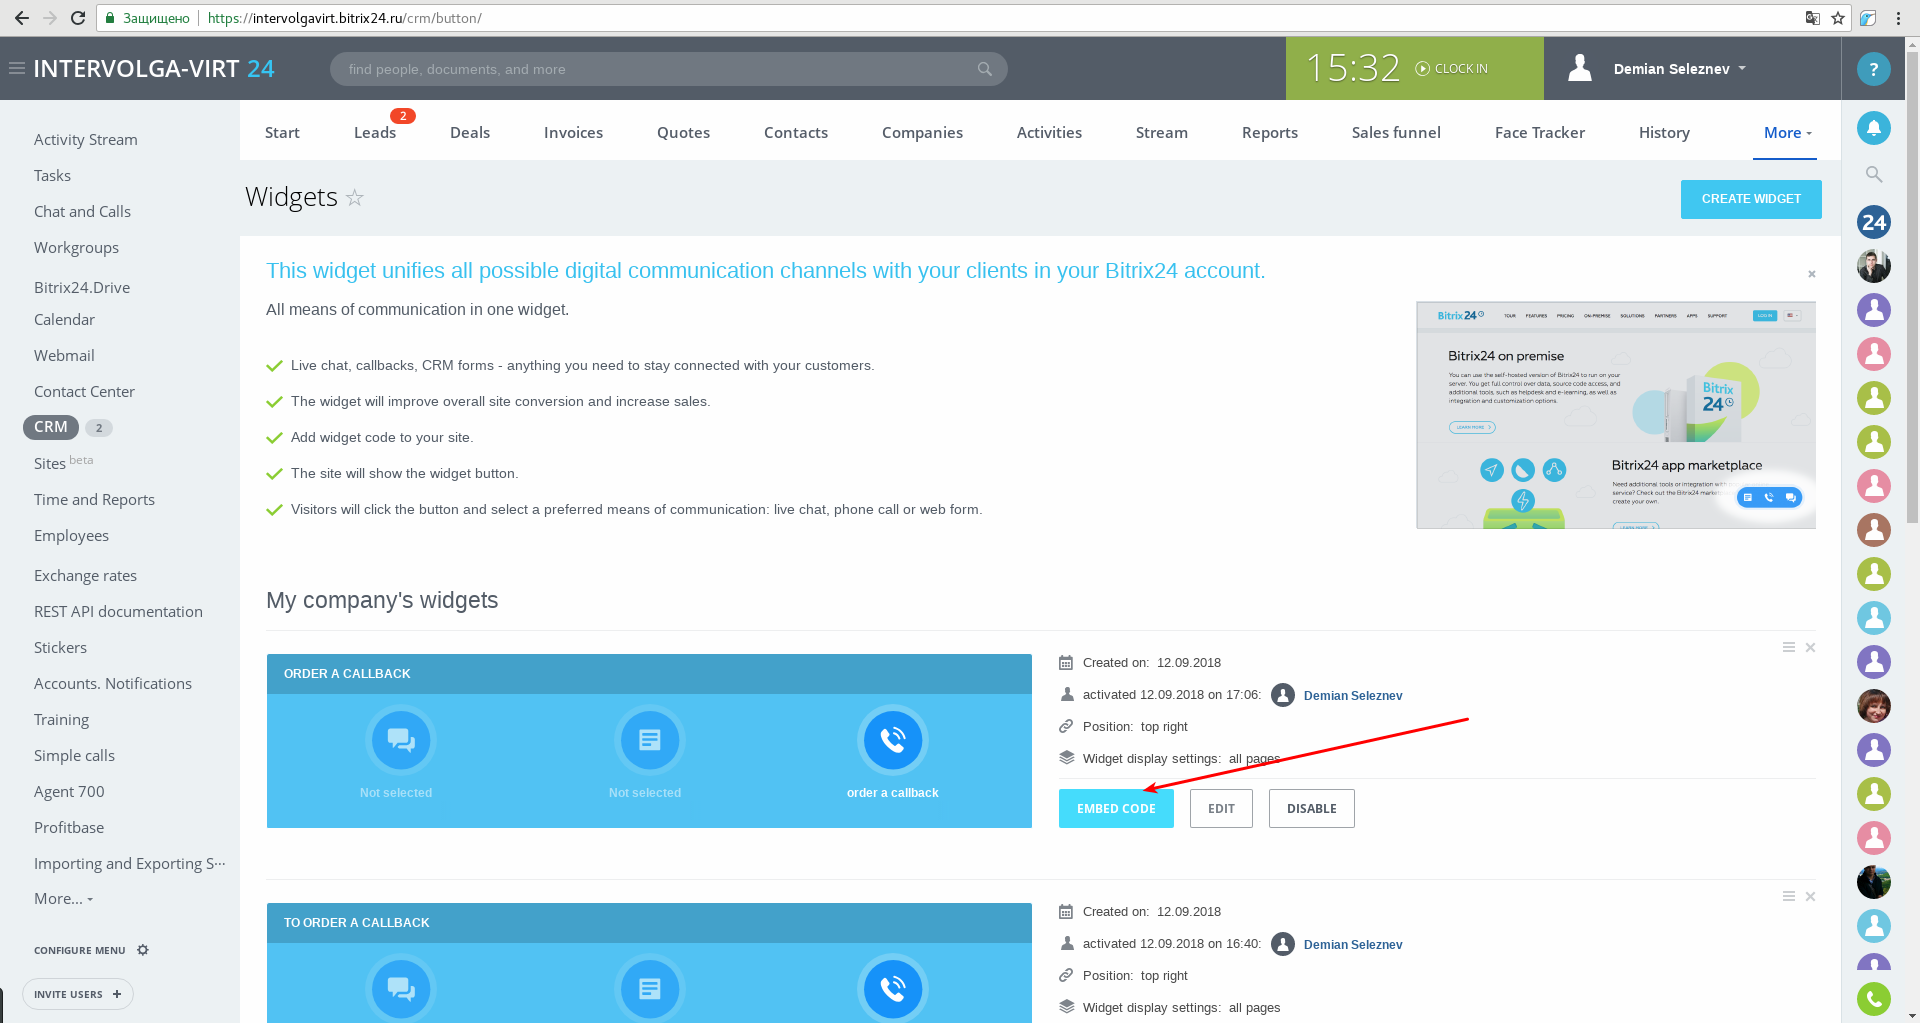
In Bitrix24 CRM, click on "CRM" left menu item -> More -> My company's widgets
-
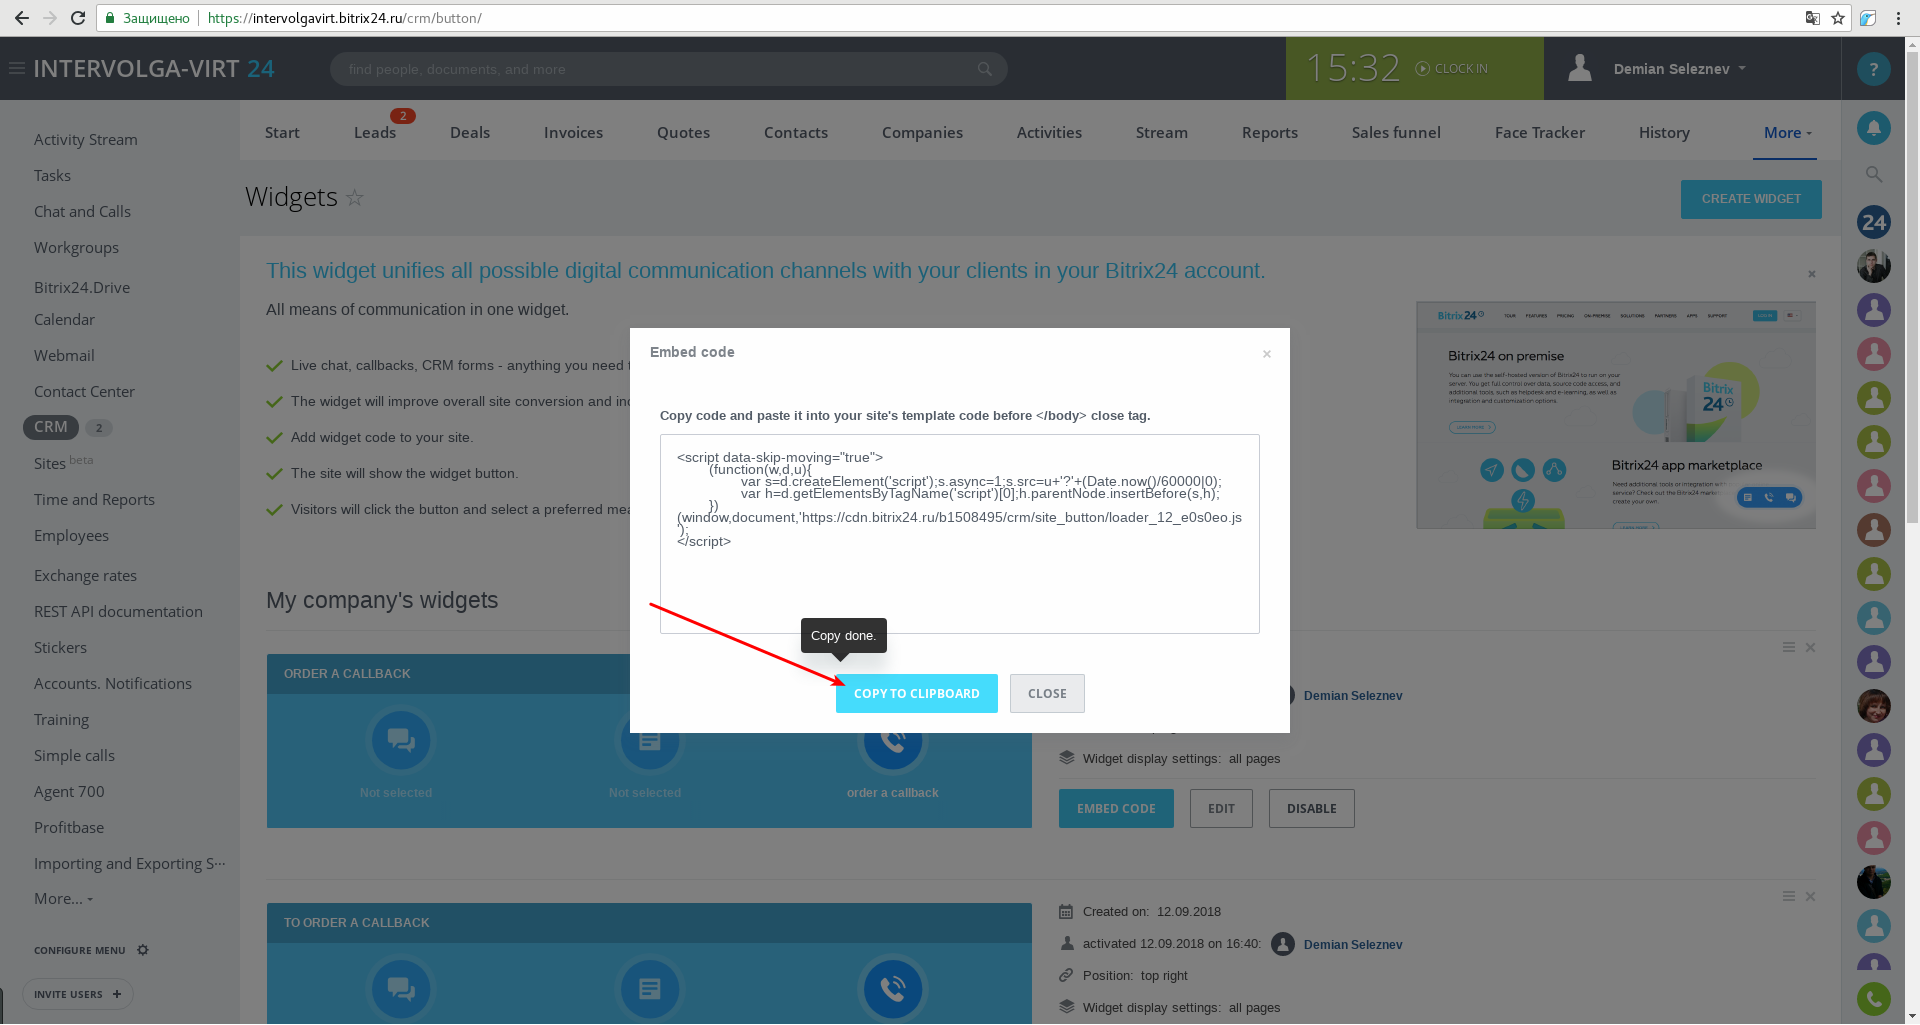
Click the Website Code button:
Press Copy to Buffer in the window which opens:
Next, we go to our test website.
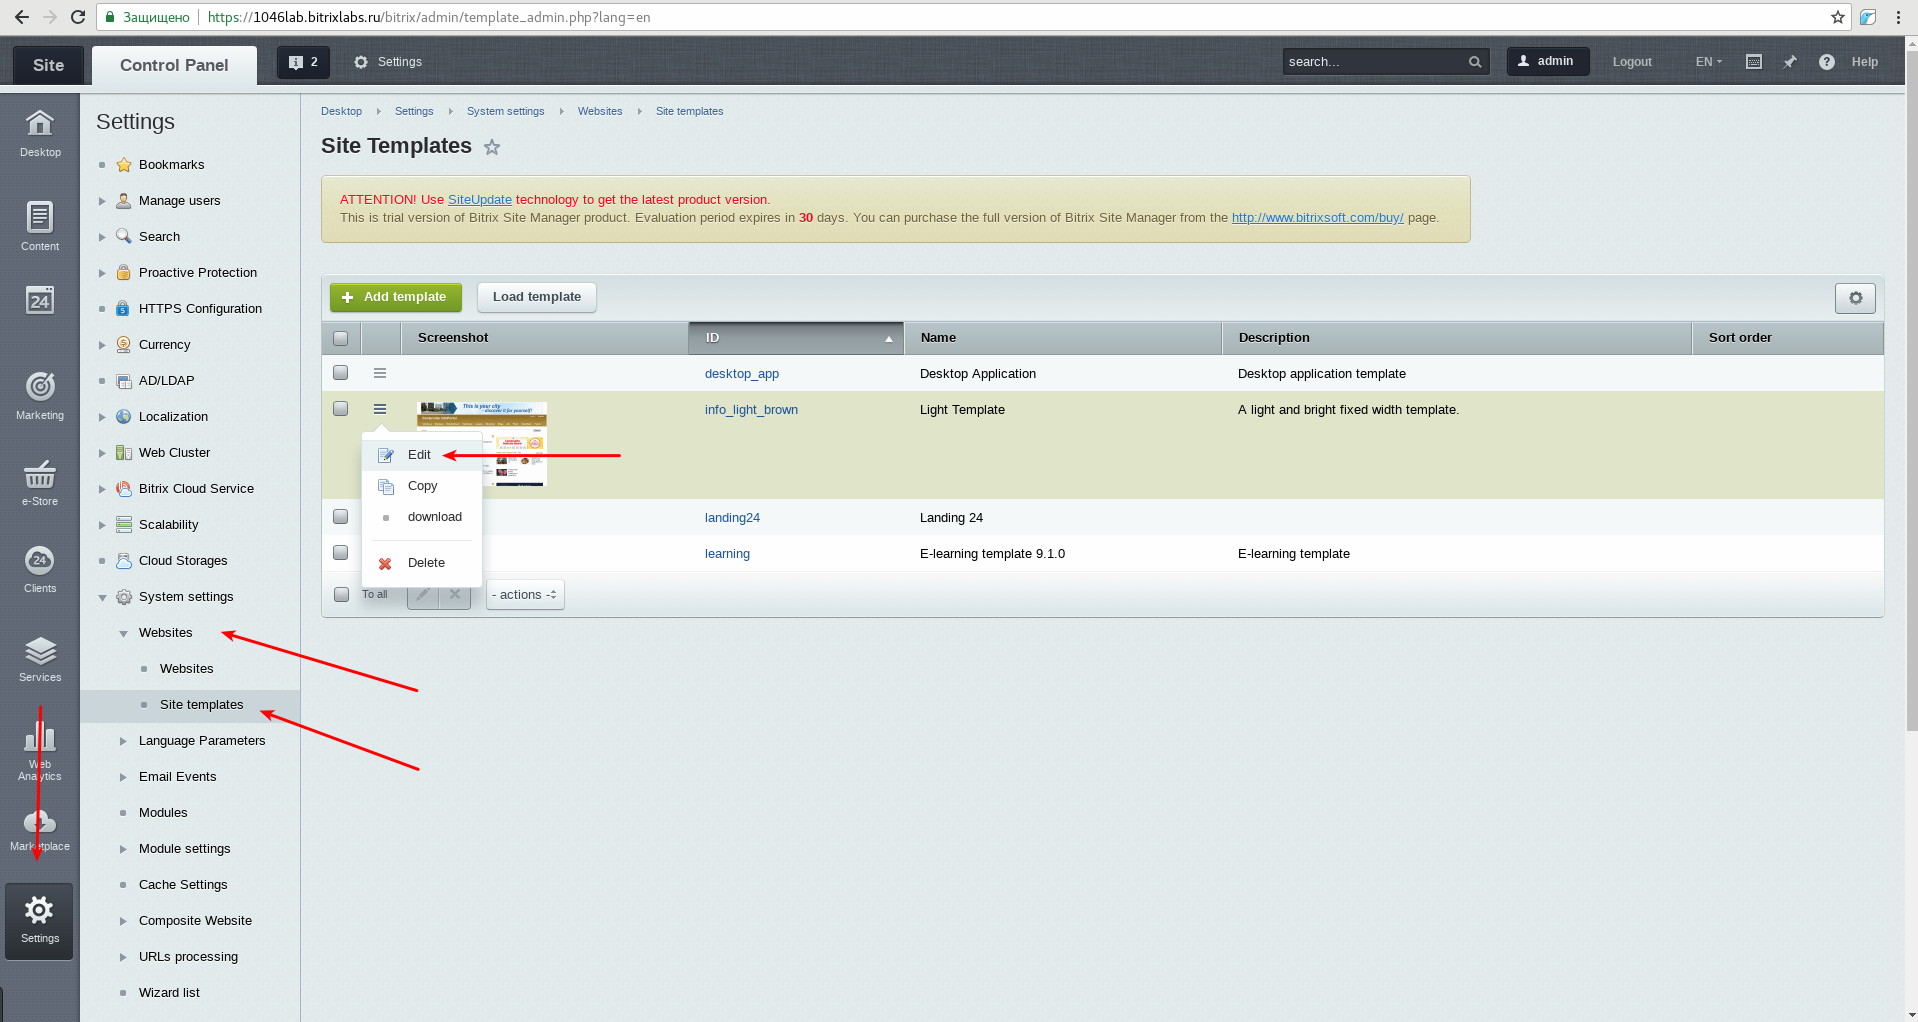
Go into administrative mode, where we consecutively select the Settings-Product Settings-Websites-Website Templates sections.
Then, we select Change in the template being used:
We go to the very bottom of the template code and insert our script before the closing tag </body>:

Save.
As a result, all pages of the website have the new widget which attracts clients’ attention and allows them to order a free call on the website:
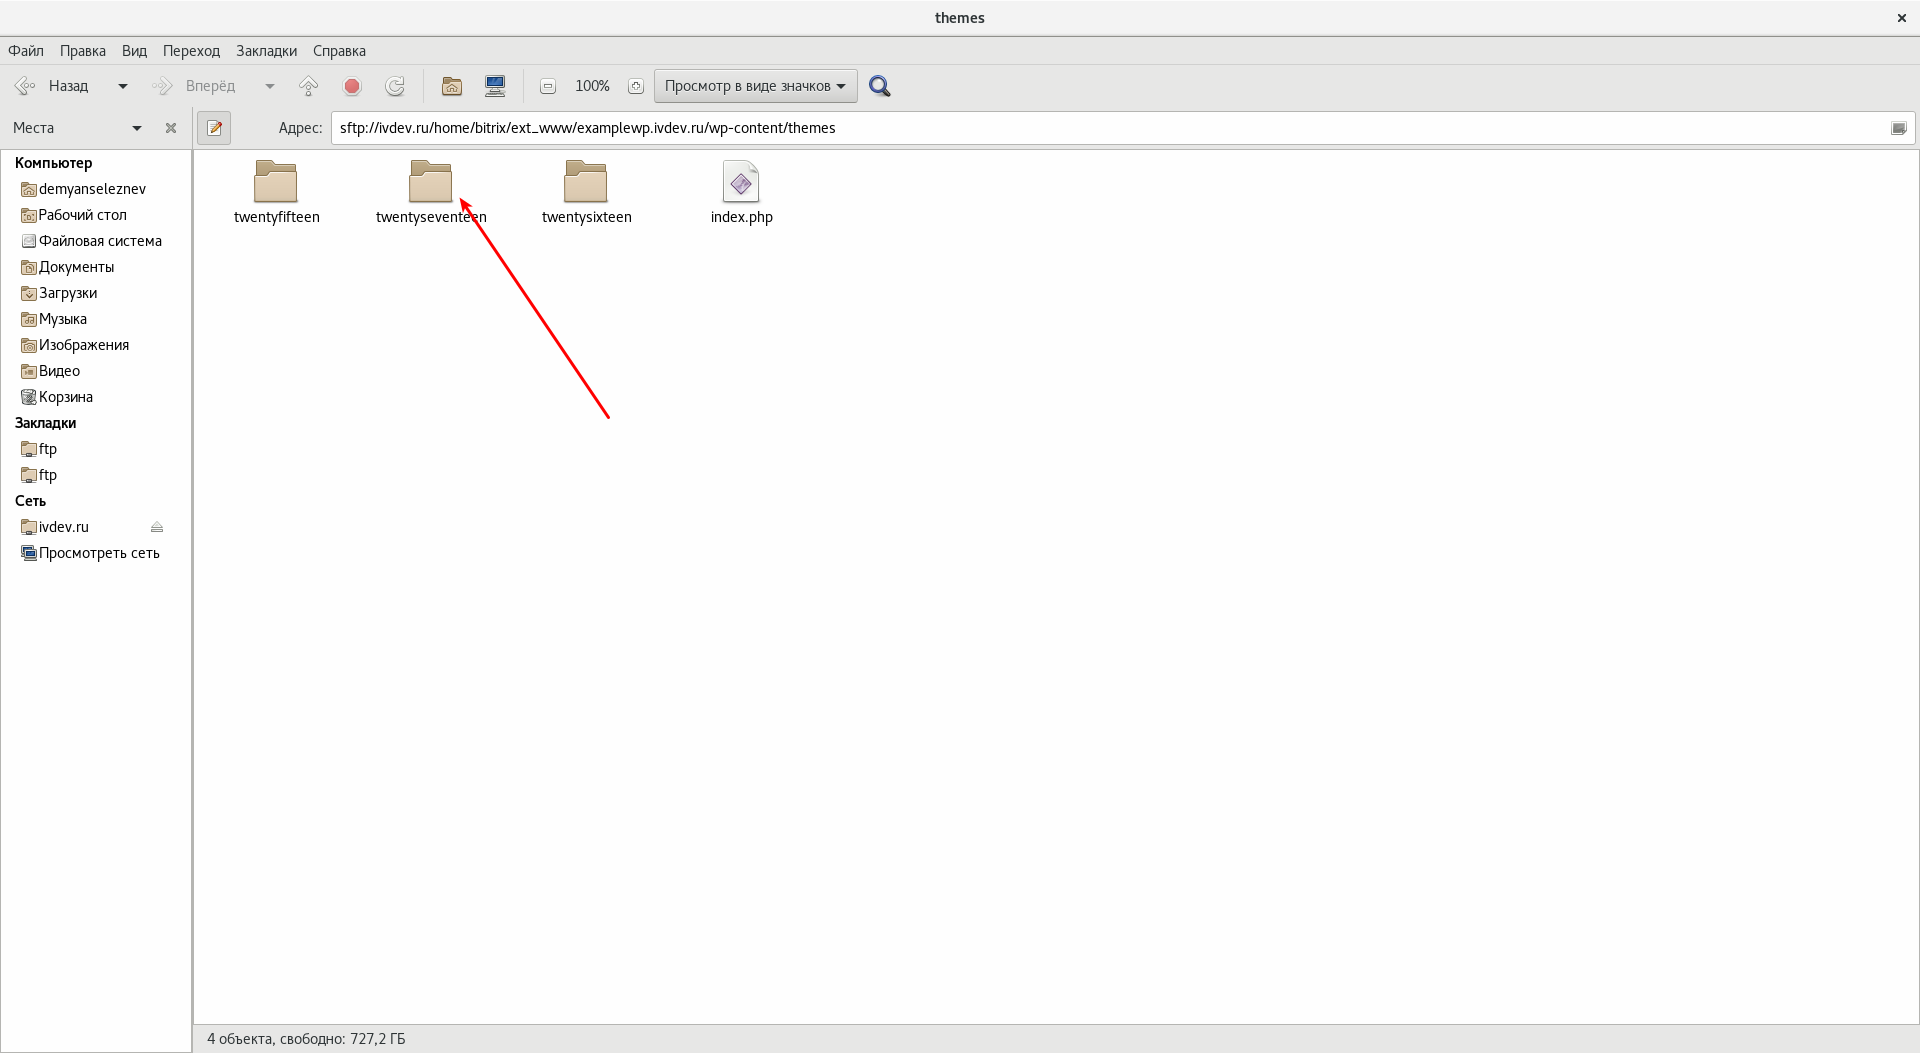
How to embed Bitrix24 widget on a Wordpress website
To embed a Bitrix24 widget code on a wordPress website, you need to follow path:
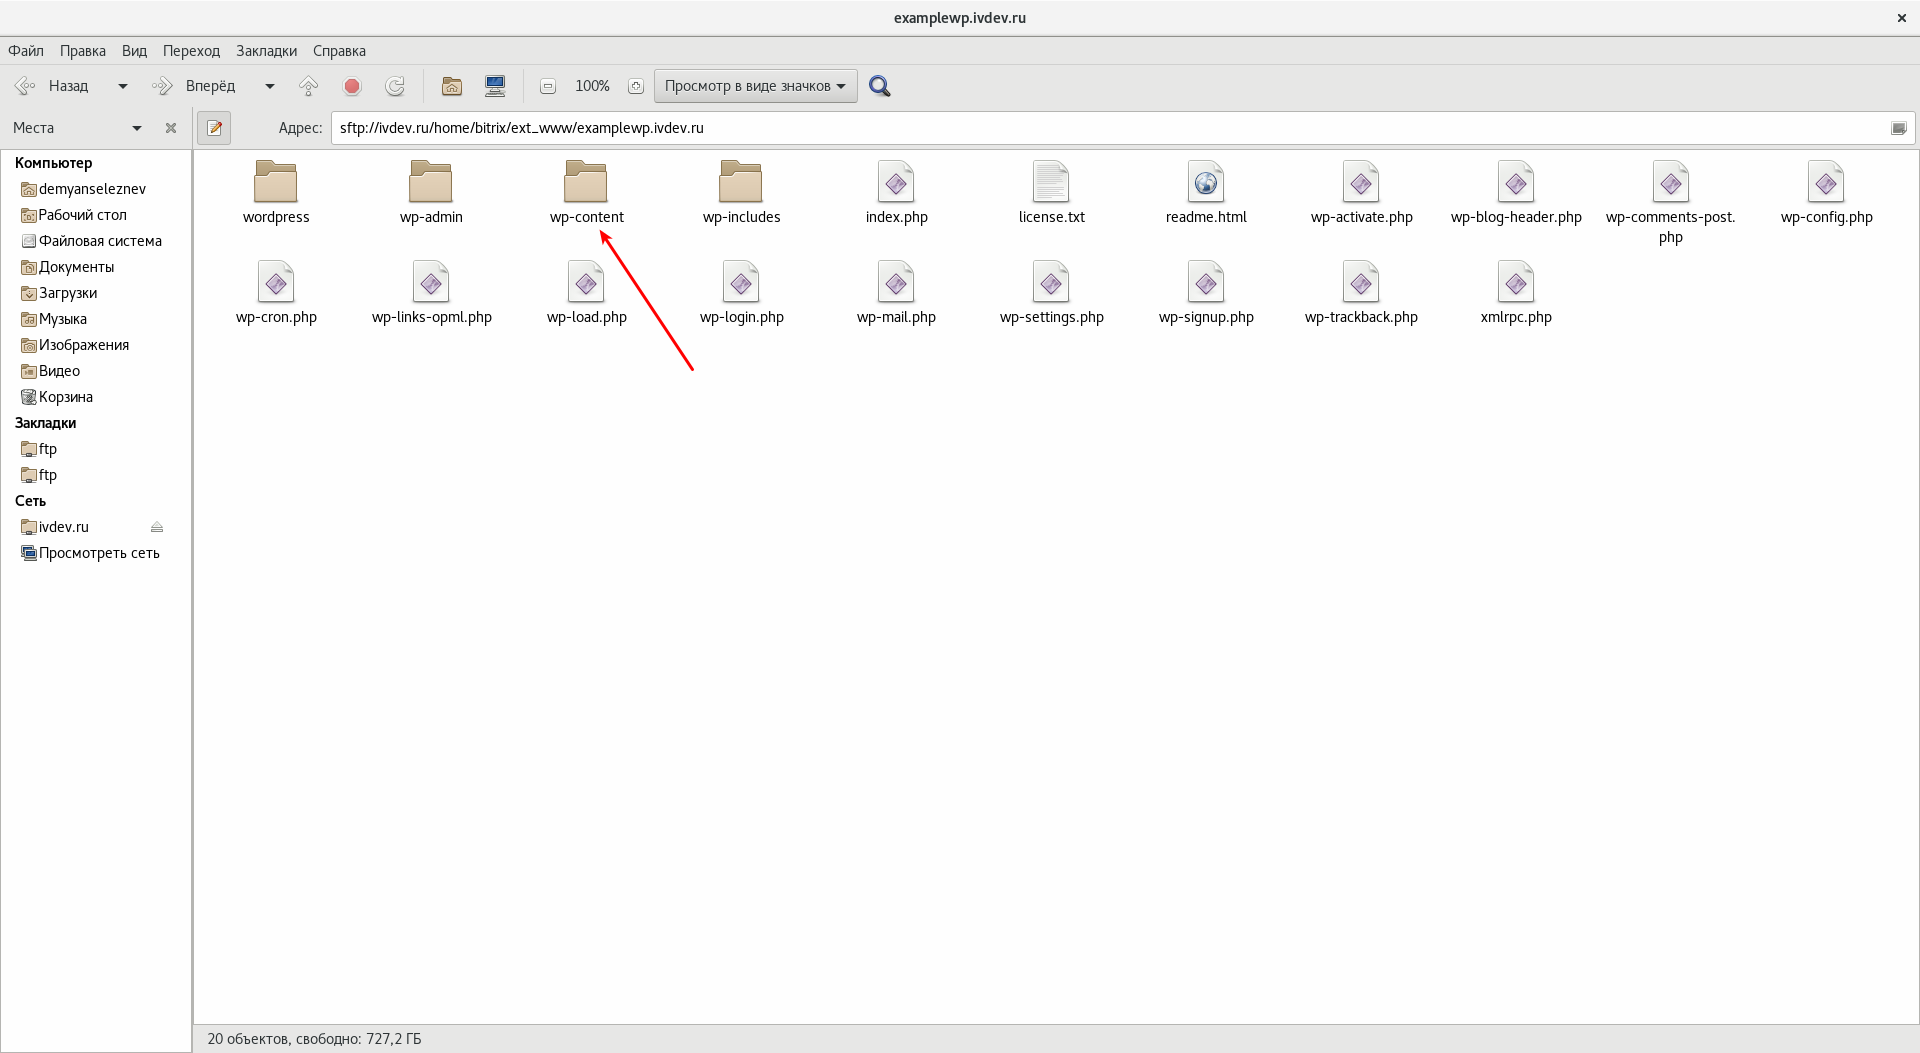
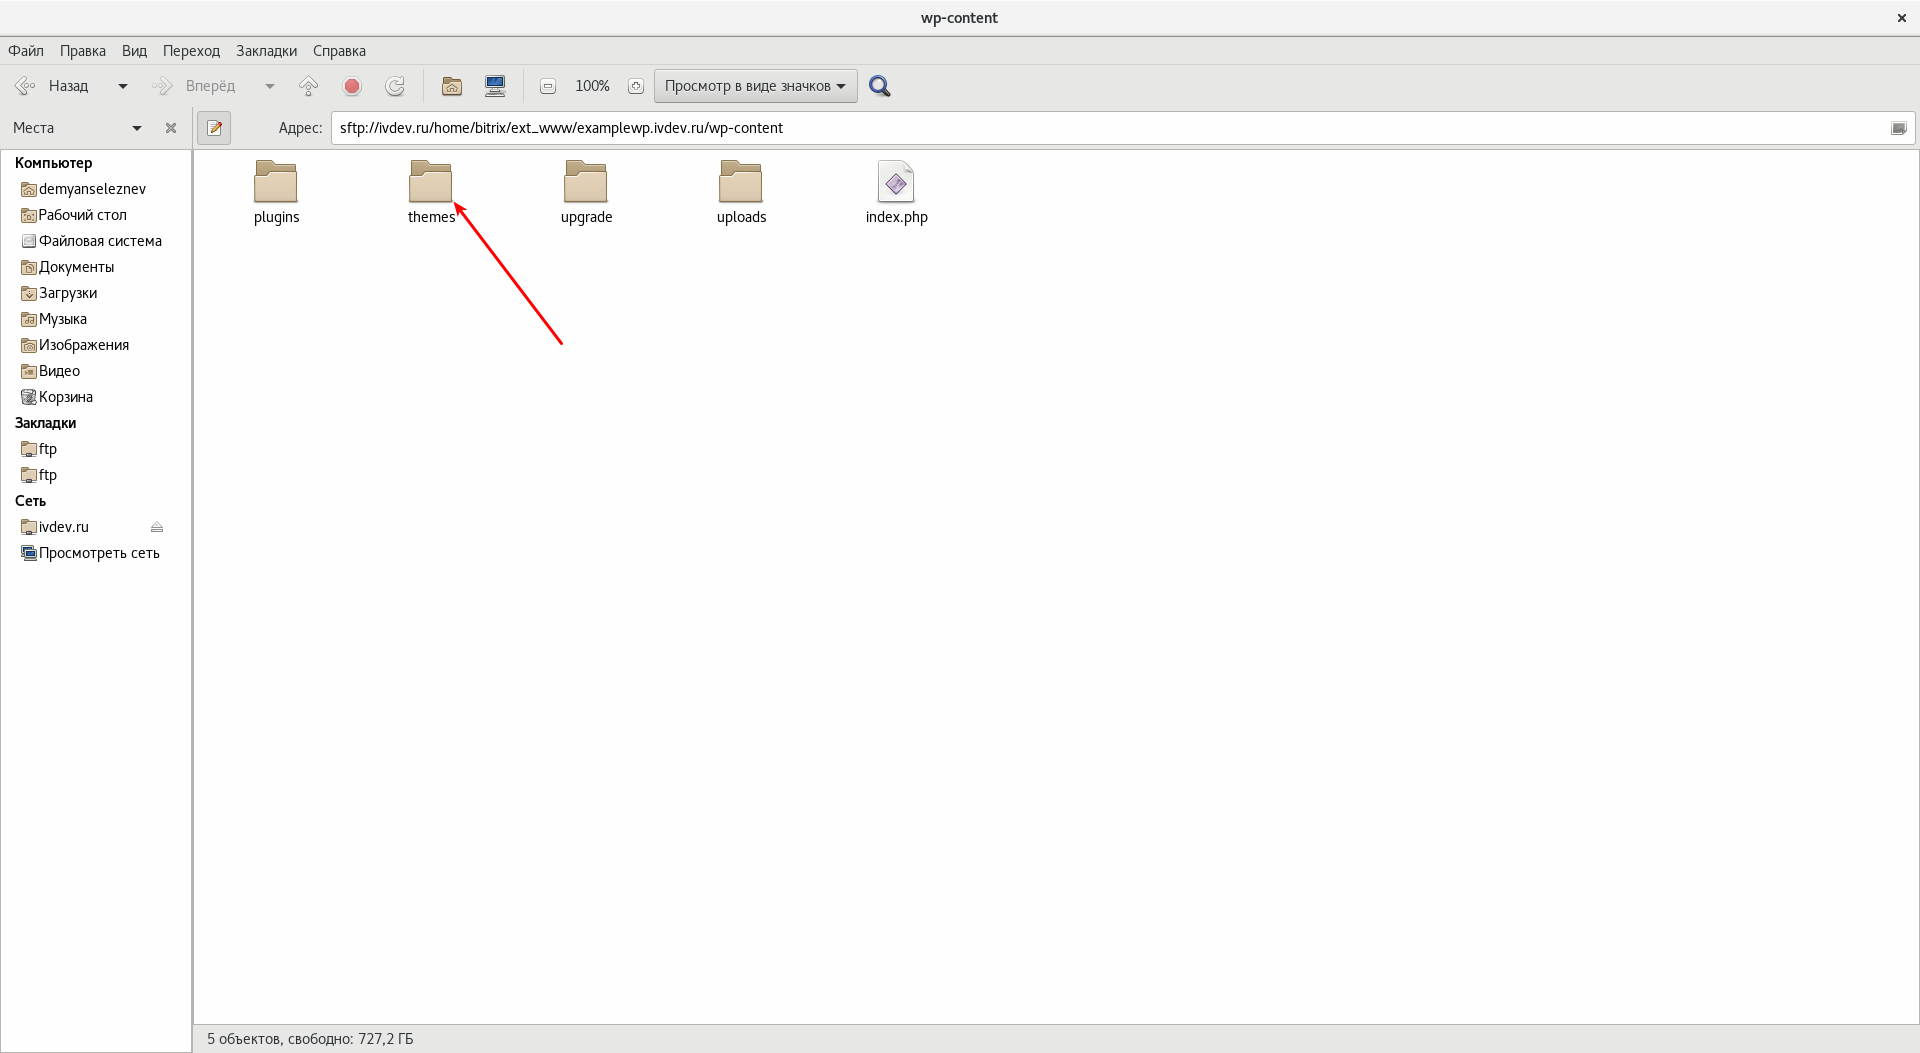
Here you need to choose your site's theme:
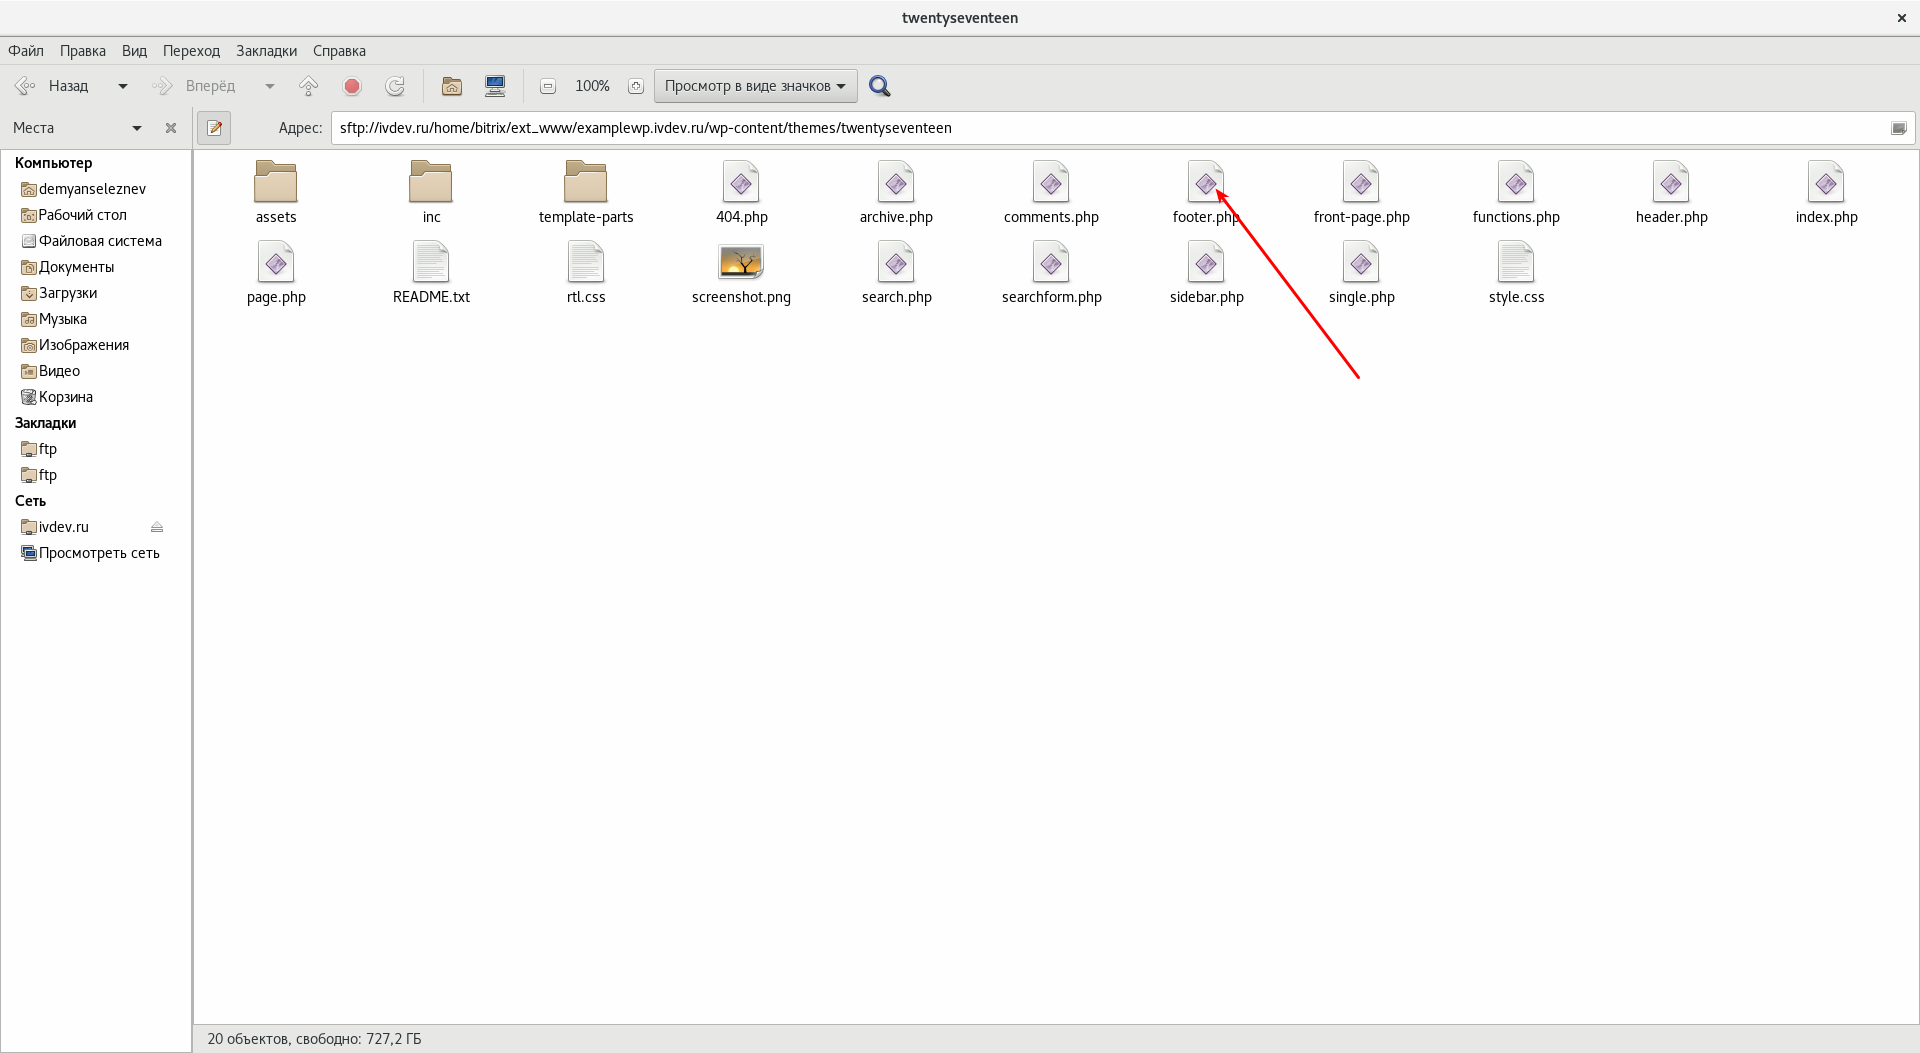
Open footer.php file, scroll down until you get to "/body" tag and paste the copied code right before it:
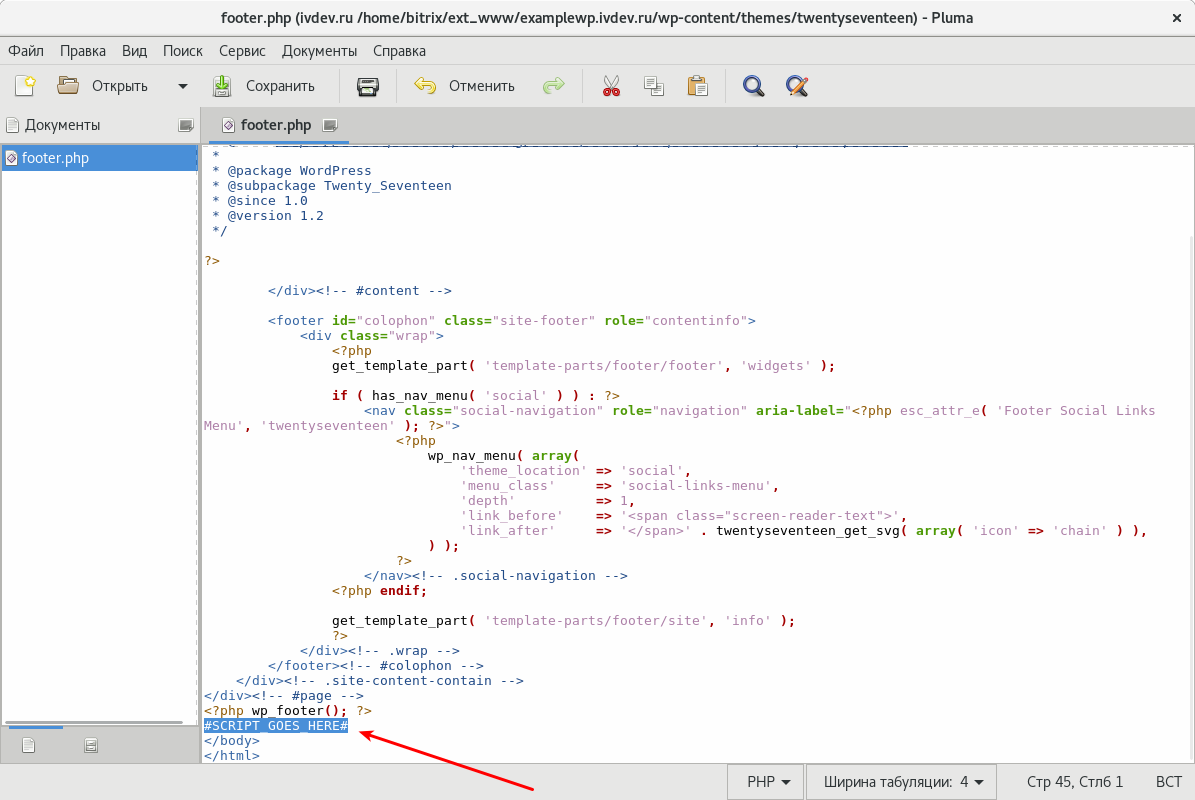
Save, and close the file.
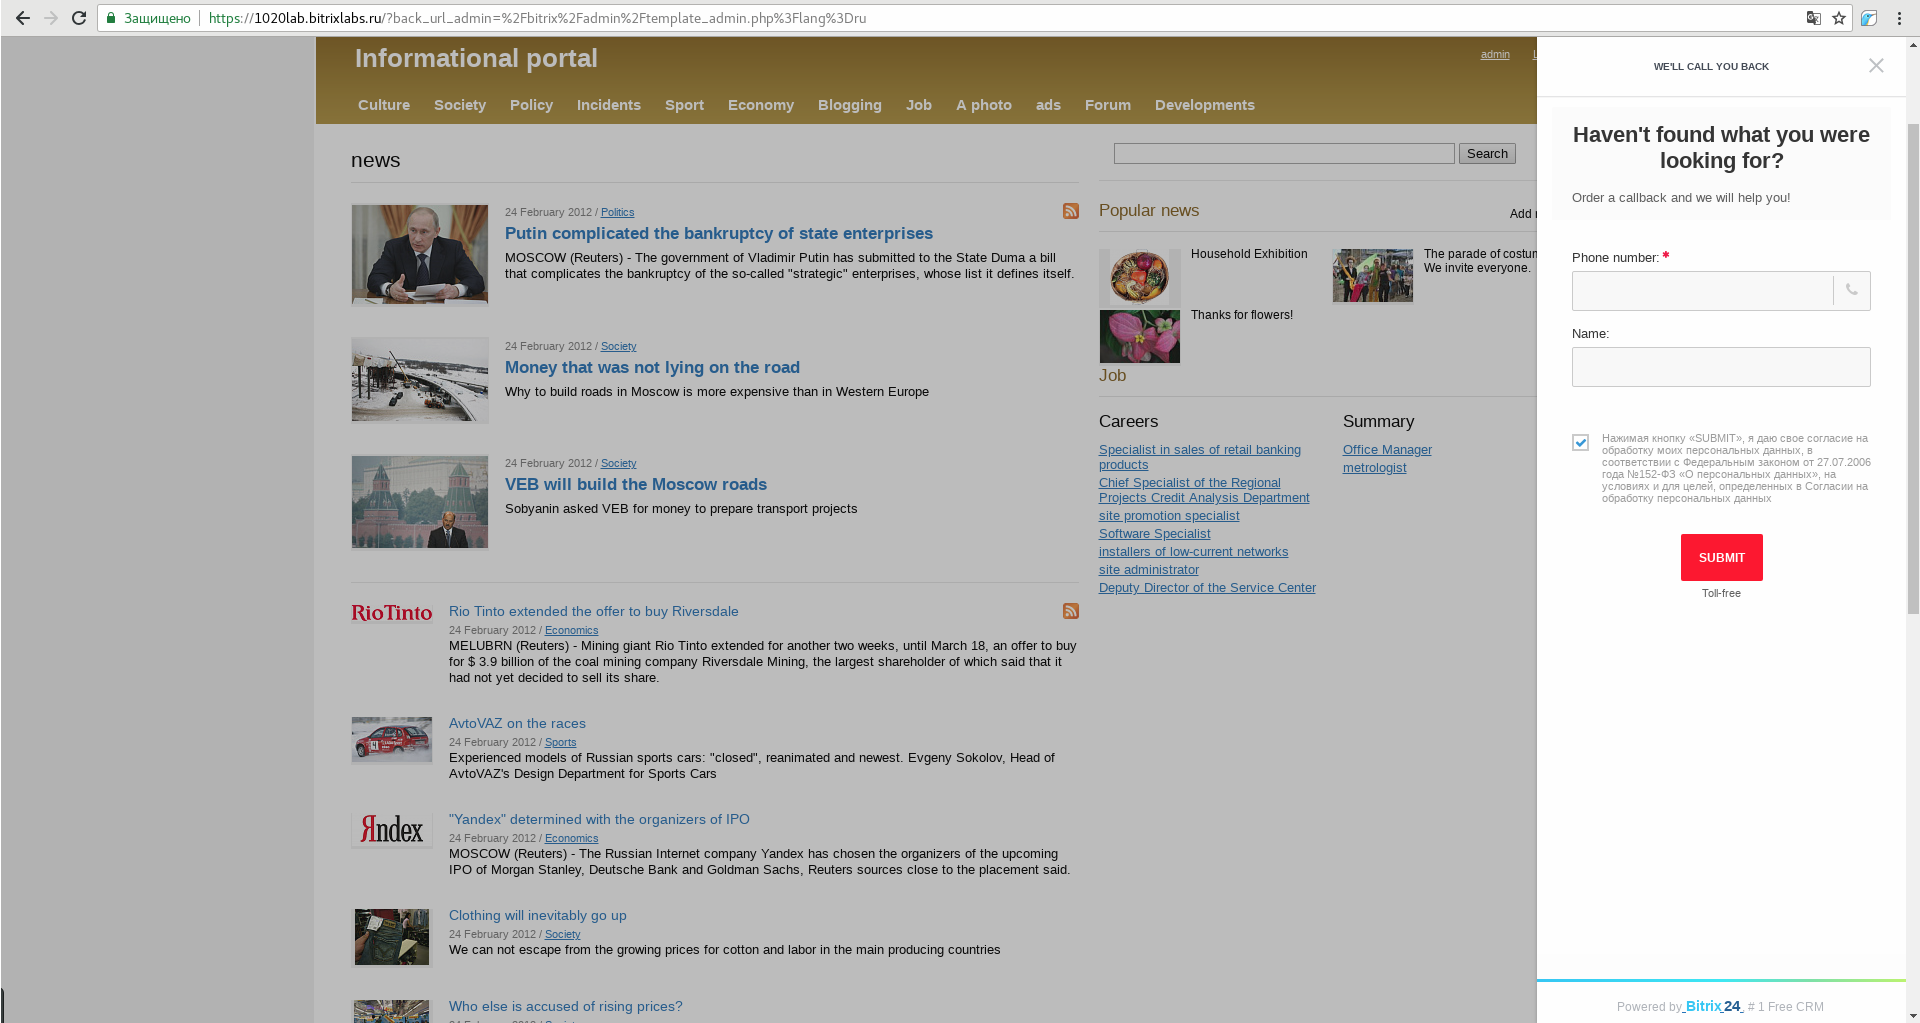
The Bitrix24 widget on a Bitrix website:
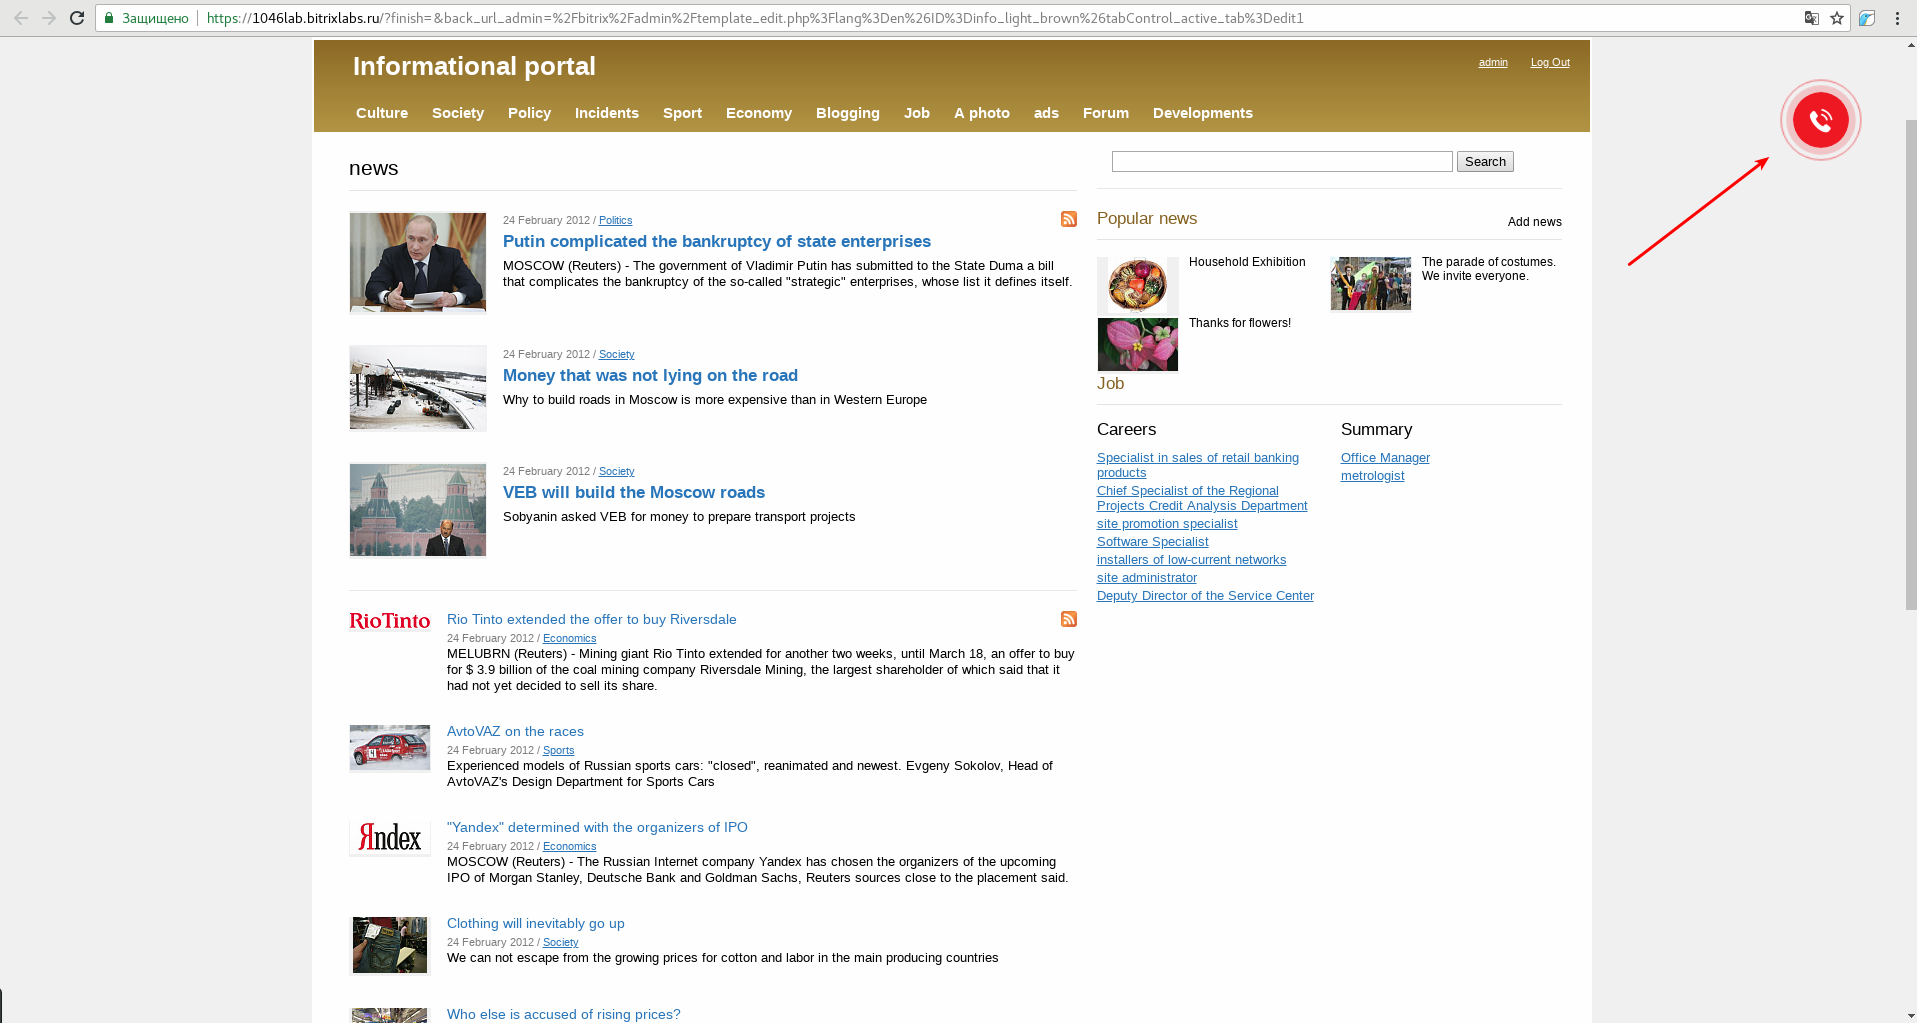
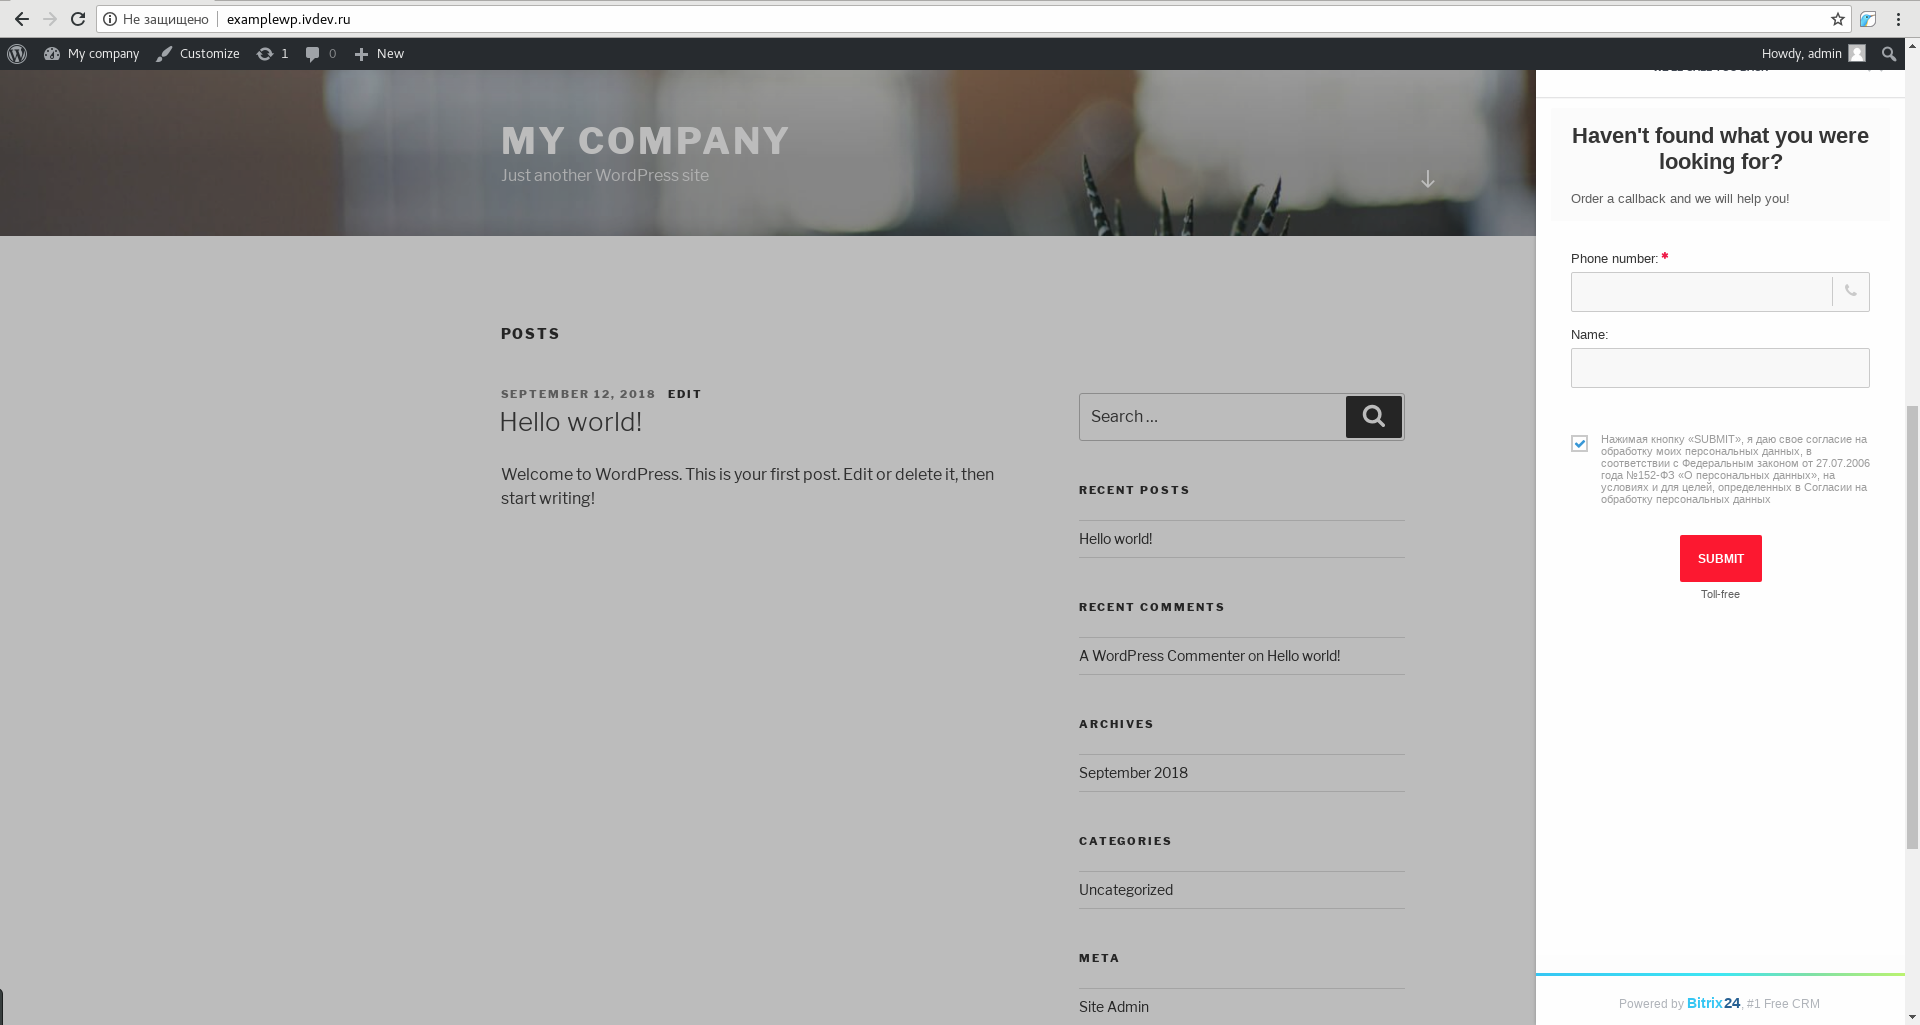
And here, the Bitrix24 widget on a WordPress website:
Clicking the widget will open the form we created:
The same form appears on WordPress site:
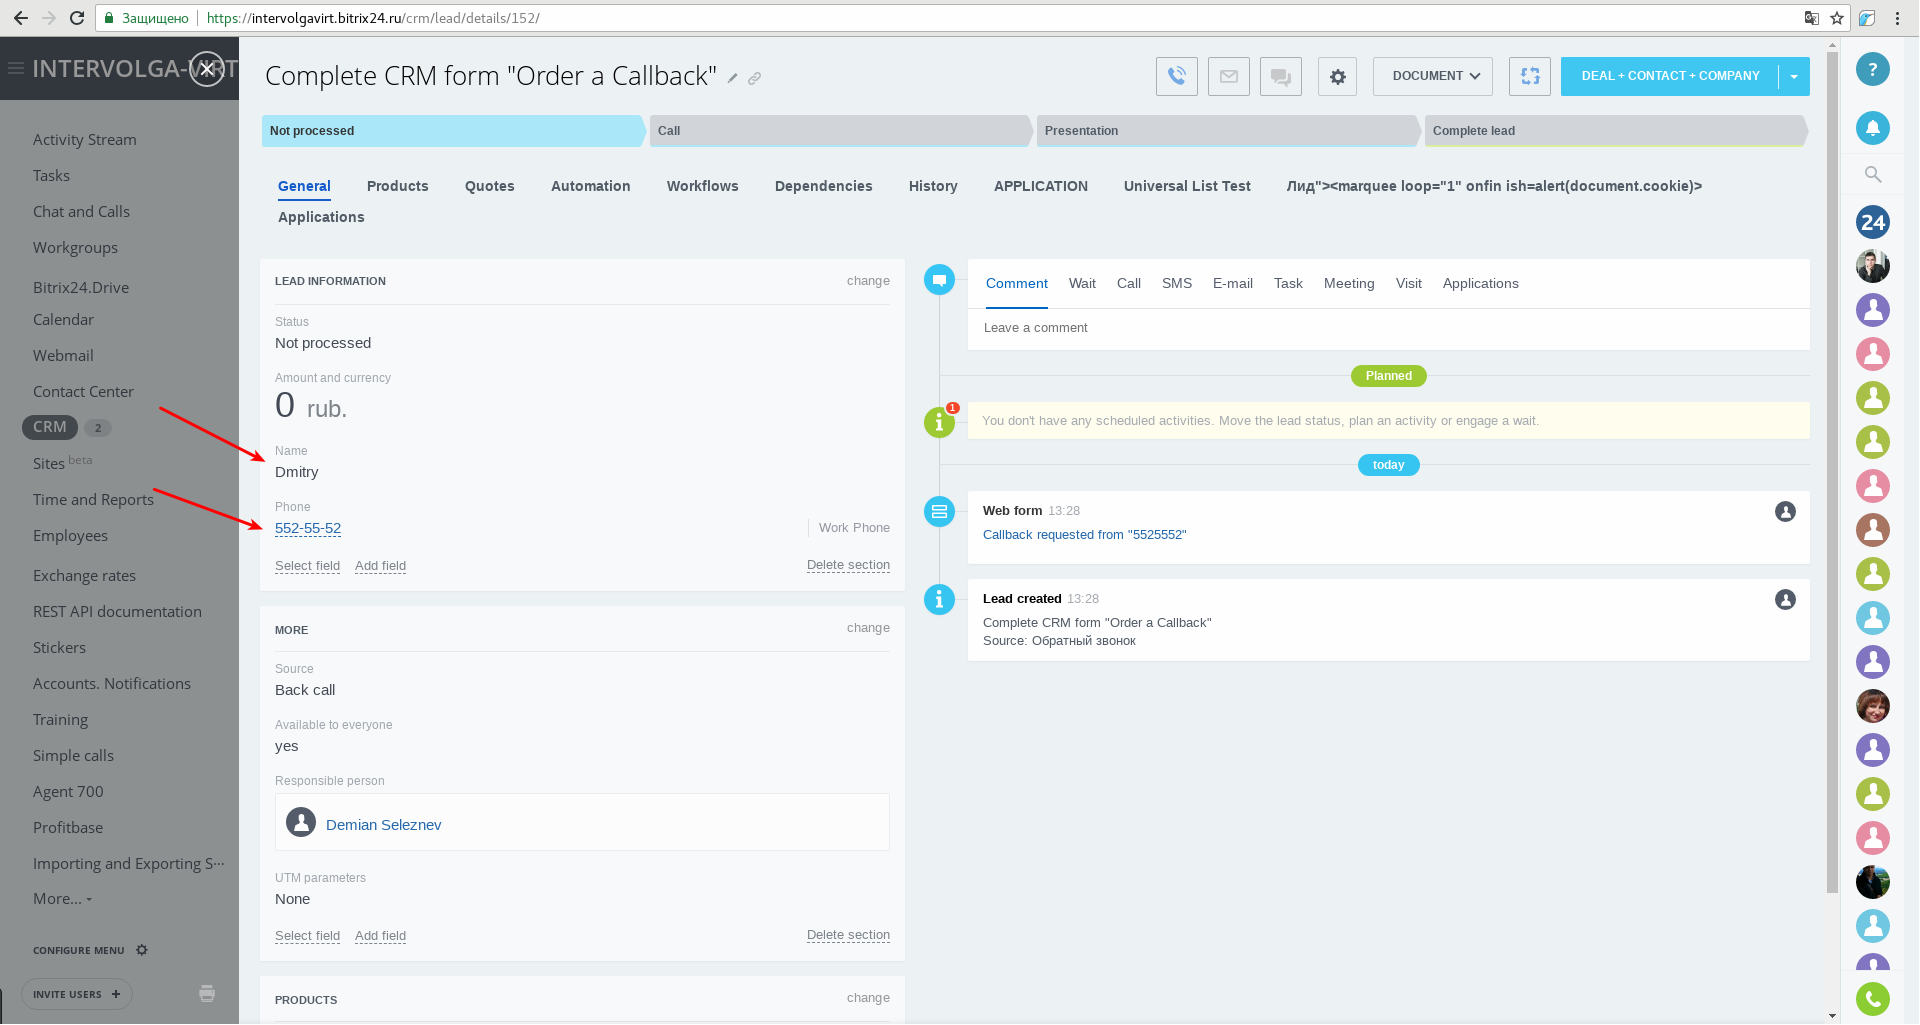
When the form is completed and submitted, a new lead is created in Bitrix24 and the responsible person is notified.
They can then call the interested client back:
In this article, we have shared a simple way of embedding a Bitrix24 form and widget on a website.
However, you may have to deal with more difficult tasks during actual operation. Our experts can implement any information exchange schemes between Bitrix24 and websites, ERP or other systems.
We will be glad to help you.
- 26.09.2022
-
Aleksandr Davydov